
Does Size Matter?
Brewing Large Beers
I am not always one to drink a lot of big beers but there is always a time and place for them. With my current system being a Grainfather all in one system, it limits me to the amount of grains I can use for a single mash, so a high gravity beer was out of the question for me. The most I ever put in a mash was about 17lbs which fills upright to the holes for the handle, which is used to lift the grain basket out of the boil kettle. It has always been a goal of mine to brew some 10 – 13% beer with my current system, and it came with some challenges. It is known that you can add sugar until the desired gravity is met. However, I worry the beer will then be too dry and not have that desired rich, deep, maltiness, and complexity from the roasted grain. The purpose of this brew was to see how far I can push my system, what my efficiency will be, how it will affect the wort and the end result taste.
Starting off
The first challenge I faced was, “How am I going to go about this? What technique should I use when brewing this big of a beer?” For those who have a smaller brewing vessel and only brew five gallons at a time, the necessary grains needed to achieve the desired gravity could cause some issues when you begin planning out your brew. My first step was to utilize a process called a reiterated mash. In doing so, you create wort from your first running’s and then use it as your strike water for your second mash.
Using BeerSmith, a software where you can input your recipe, it will tell you all the info that you need as well as what your starting gravity, IBU’s, color, and if it is in style. This software will also calculate out how much water you need for the mash as well as how much sparge water to reach the desired pre-boil volume. However, with BeerSmith knowing all the grains will not fit in your current brewing vessel, just plugging in 25.5lbs of a grain’s recipe will throw the needed sparge and mash water all off. Therefore, you will not be able to use this recipe to set up on brew day, but it will be beneficial to have on hand throughout the brew. It will still allow you to have an idea of how much will be converted to sugar for your gravity, color and IBU’s. When you get to the session part of the recipe on BeerSmith, you can then put in the gravity and total volume of water for the pre-boil and post-boil. This will give you the efficiency of the brew.
When figuring my mash and sparge water, I learned I only needed half of my grain for this batch, which is more manageable. Since this batch calls for 25.5lbs of grains, I split the grain bill in half as I referenced another recipe through BeerSmith. My final total was a 12.75lbs grain bill for both mashes. For the mash, I am looking for a water volume of 5.35 gallons and a sparge of 2.74 gallons.
Building the recipe
For the recipe, I used distilled water and a stout water profile that I had on BeerSmith. I recorded this process so that I may be able to replicate this experiment again.
| Calcium – 180 ppm | Magnesium – 10ppm | Sodium – 75ppm |
| Sulfate – 85.3 ppm | Chloride – 341.2 | Bicarbonate – 50ppm |
Breaking this down into what you would add into your mash and sparge water, it will look like this:
Mash:
| Chalk – 1.7g | Gypsum – 1.76g | Epsom Salt – 1.93g |
| Salt – 3.85g | Calcium Chloride – 9.36g |
Sparge:
| Chalk – .87g | Gypsum – .90g | Epsom Salt – .99g |
| Salt – 1.97g | Calcium Chloride – 4.80g |
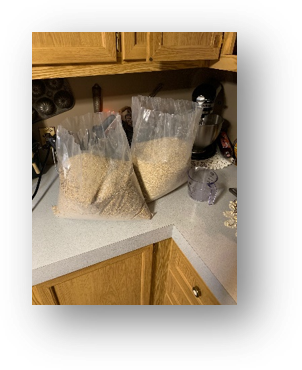
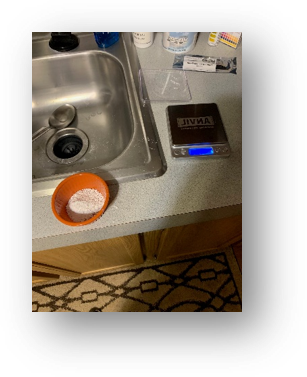
For my process, I ended up making two batches of sparge water. To keep it simple, I did not use all of the first batch of water but, instead, dumped what was left of the first batch. I then made up new sparge water using the water additions to keep the water profile the same. For the grains, I used two separate bags and split both in half. Then, I put both bags on my scale and adjusted them slightly to make both perfectly even.
Recipe name: Size Doesn’t Matter – 5.2 Gallon Batch
Grain Bill Boil Additions Mins.
| 18# | 2-Row Brewers Malt | 1oz | Bravo Hops | 60 | |
| 2# | Munich Malt | 1tsp | Irish Moss | 15 | |
| 2# | Roasted Barley | 1# | Table Sugar | 10 | |
| 1# | Chocolate Malt | ||||
| .5# | Crystal 60L | ||||
| .5# | Crystal 120L | ||||
| .5# | Black Patent Malt | ||||
| .5# | Flaked Oats | ||||
| .5# | Flaked Barley |
Yeast:
Brew Day begins!
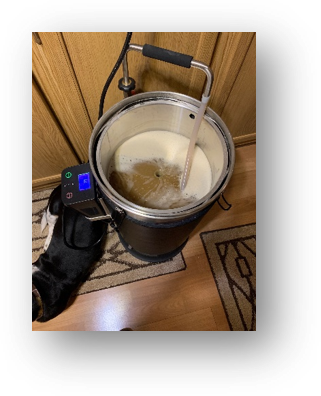
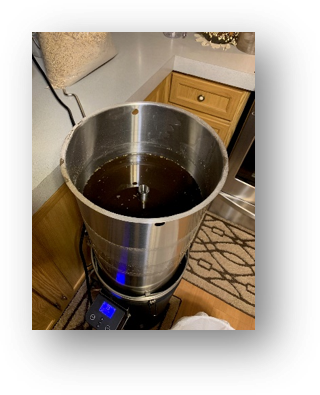
When I began, it seemed to be not any different than any other brew day. I added my distilled water with additions to the correct level and then started heating to 157 degrees. Once the temperature was reached, I added in the grains and started my first mash timer for 60 minutes. About 15 minutes into the first mash, I took my first PH sample and it was about 5.2 (no acid addition) which is right on track for what for the recipe requires. With the sparge water at 157 degrees, same as the mash temperature. Doing so ensures that I may not heat the water passed the temp I wanted to mash. The whole sparge took about 40 minutes to reach the necessary volume for the second mash. I then took the grains out of the basket by scooping them into a five-gallon bucket I had next to my Grainfather and left the mash basket in the sparging position. This process went smoothly; however, I did have a little trouble getting the mash all out of the bottom of the grain basket. After checking to make sure my temperature was still correct, I placed the basket back into the wort and proceeded to add the grains for the second mash.

With my second mash timer set at 60 minutes and the temperature at 157 degrees, it was time now to see how the second mash would affect the wort. I waited until about 30 minutes into the mash to pulled a sample for a ph reading. Oddly enough, it seemed to have gone up just by the slightest bit. With all the dark grains in this batch, I would have thought the ph would have gone down. Then I started to wonder “was it the water additions in the sparge, the thickness of the wort messing with the strips, or that may be because most of the dark grains were in the first mash that would have caused this?”

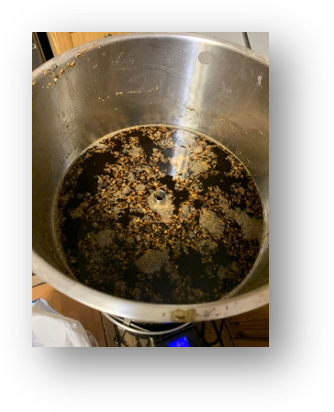
By this point, the mash is very thick and a good portion of the wort seems to be hitting the overflow above the grain bed. After the second mash was finished, I pulled the grain basket up out of the boil kettle into the sparge position. After 15minutes of watching the wort level in the grain basket, my worst fears seems to be coming true, Oh yes, the joys of a stuck sparge! For over an hour, I stirred the mash while adding in my sparge water. Now at 167 degrees, I slowly began seeing the wort flow through the grain basket, to reach my pre-boil volume of 6.8 gallons. I then measured my gravity at 1.098 by far the biggest beer I have ever brewed. Before now the biggest beer I have ever down was around 1.080 specific gravity.
Now that my mashes are complete, Its time to focus on the boil and the additions. This is much like the process of any other boil, I began adding in my hops and other adjuncts while stirring occasionally to make sure nothing has settled to the bottom or is sitting on the heater too long. The entire boil was a total of 60 minutes. In that time, I lost .65 of a gallon due to evaporation which, brought my total to 6.15 gallons in post-boil, bringing my gravity up to 1.103 with the addition of one pound of sugar. This became a sugar-rich brew with very thick wort. Currently, it seems to be a little slower coming out the chiller, not by much though, the pump on the Grainfather seemed to handle it okay.

Wrap up
All in all, it was a successful brew day. Needless to say, it was one of the longest brew days that I have had in a long time, totaling to nine hours from start to finish. With a total of 5.5gallons into my fermentor, I can’t say I’m complaining too much. Now it all depends on your current system. My Grainfather does not heat up quickly. If you are using gas, your brew day could be a little faster. My batch fermented for about two weeks, reach the final terminal gravity of 1.026. Using my BeerSmith recipe, I was able to calculate with the total amount of grains and by plugging in my gravities with the volumes. I had a final mash efficiency of 70%, which is not horrible and I was happy with these results as I was expecting it to be lower than what it was. When I took a tasting sample of this beer while transferring into secondary, it was very much on the lines of what I was looking for. It was very smooth tasting (almost dangerously) and has that warming sensation all the way down your throat. It also has this fruity ester and maltiness that made me excited to keg this beer up.
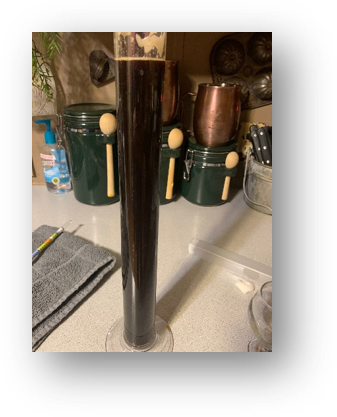
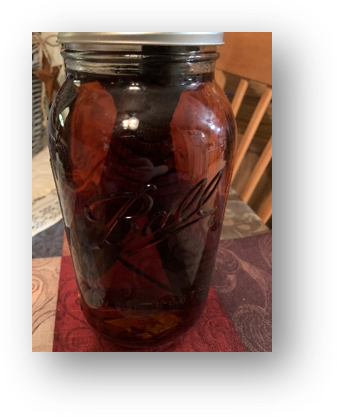
There are many things you can do to Imperial Stouts to boost the flavor. Since I spent so much time on this beer, I wanted to make it even more special. You could put coconut in it or some coffee, however, I wanted it to have an overall barrel-aged kinda taste to it. I bought the biggest bottle I could find of Jim Bean and poured it in a mason jar with two vanilla beans and two medium oak spirals. Then I let this jar sit off to the side while this beer was fermenting. When I transferred the beer to secondary, I took out the oak spiral and put them in the bottom of my glass carboy. I cannot report on the final result yet, however, I am excited to see how it turns out.
Overall, I learned a lot while brewing with a reiterated mash. There are still some questions that I still have not figured out yet, such as “is having a high gypsum mash and sparge water is this what help with the ph on this brew?” Now, I wish that I had my electric ph meter working during this brew, which would have provided a more accurate reading. Also, to see if the color on the ph strips didn’t change because of how thick and dark the mash was. Again, I would expect a longer brew day especially if you have an electric brew system as I do. With such a long sparge and the wort being so thick, it’s possible adding some rice hulls might make this a little easier when dealing with the second mash. All in all, even with a few challenges, this was a very fun brew. In the future, I can see myself brewing a big beer once a year in December and letting this sit in a barrel then tapping it on New Years’. I hope seeing my process helps and makes you want to try a big beer brew. Remember, even if you have a smaller system, don’t let that set you back; a successful brew is still possible!