
How to Build a Keezer
Building a Keezer is a fun and rewarding project for both homebrewers and craft beer lovers. This project can seem intimidating at first, but it only takes some rudimentary carpentry skills and a few basic tools.
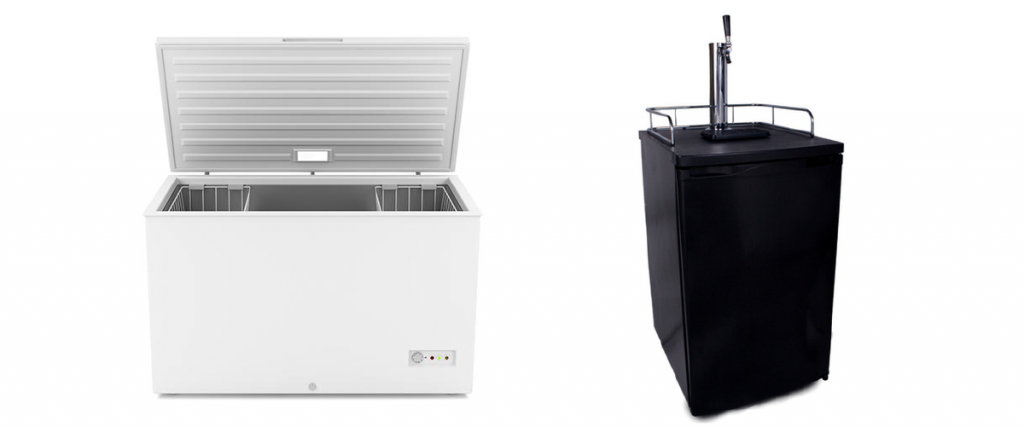
First, what is a keezer and how does it differ from a fridge based Kegerator? A keezer is a chest style freezer that has been modified to serve draft beer. It’s advantage over simply converting a standard upright fridge into a kegerator because of its potential for customization, personalization and greater keg capacity.
So what do you need to build a Keezer?
Draft Beer Components
- Fridge (shank) conversion kit, everything you need to install the draft side, except CO2 cylinder and kegs.
- CO2 Cylinder – A five pound will dispense about 30- five gallon kegs or about half that if you force carbonate.
- Kegs -You can use either ball lock or pin lock, make sure you use genuine CMB disconnectsfor best results (the above link for Fridge conversion kits includes these)
- 15/16 Hole Saw for drilling holes in collar. OK, this is also in “Tools Needed” below, but it is the only tool I recommend purchasing from Kegconnection.com because it is inexpensive and can ship with your other components. These things work great!
- Temperature Controller – This allows you to regulate the chest freezer at fridge temperatures. Here are comparison videos on two of the most popular models:
- Inkbird temp controller video
- Anvil temp controller video
- Drip Tray (optional, but recommended) we used a drip tray with a high back splash that included holes for the shanks. This is a very nice option and helps you align your shank holes perfectly.
Basic components purchased at hardware or building supply store
- A chest freezer. These come in many different sizes and price start at below $200 and go up from there. The main thing to look at is the size. You need to determine how many kegs will fit in the keezer. Also, some have a shelf over the compressor, so you may not be able to put kegs in all of the space. I normally put my CO2 and regulators on the side with a shelf. For our example build we used a 14.8 cubic foot Frigidaire chest freezer. This was large enough to hold 8 kegs, plus our CO2 cylinder, regulators, and other items This chest freezer was in the $500 range. Again, this is a personal preference and depends on how many kegs you want to tap/store.
- Boards for your collar. The size and length you will need will depend on what size chest freezer you use, but most people use either a 2×4 or 2×6 for the base of the collar and then use a 1×6 or 1×8 for the facial or front trim board. These boards are where you will drill your holes for your beer shanks, so make sure your keezer will have enough height for the top of the kegs and the disconnects (home brew kegs) or coupler (commercial kegs). In the vast majority of Keezerseither a 2×4 or 2×6 will give you enough height, so aesthetics are your main concern here. We used 2×6 boards on our build with an oak 1×10
- Other optional material includes, foam board, foam board adhesive, outdoor decking screws, paint, etc.
Tools Needed
You don’t need a lot of tools for this project. It is nice to have power tools, but if you own a limited supply or no tools you can get by with hand tools (except for a drill, you need a drill)
- Chop Saw, circular saw or hand saw. These will all work, but a hand saw will take longer
- Measuring tape, square and pencil
- Drill and bits, plus a 15/16 hole saw to drill holes for shanks.
- Impact driver or at least a bit holder and bits for your drill. Many deck screws come with a bit in the package.
- Box cutter if you are insulating the collar
Let’s get started on the build!
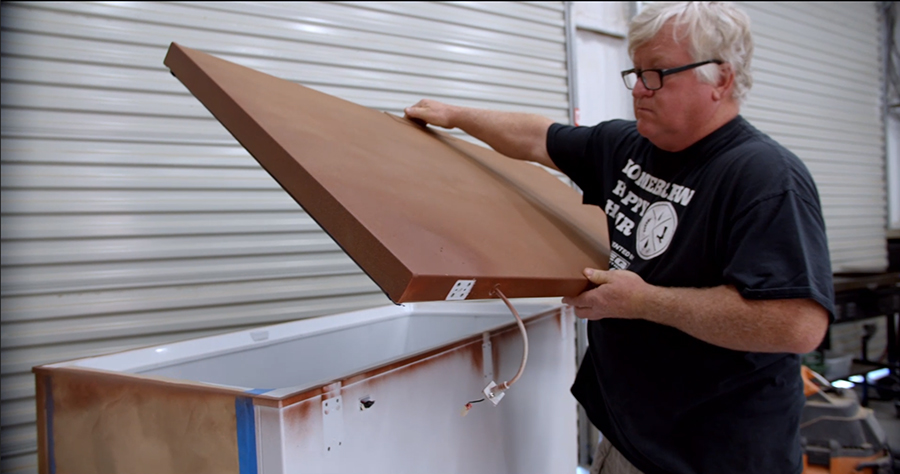
The first step is to remove the lid from your keezer.
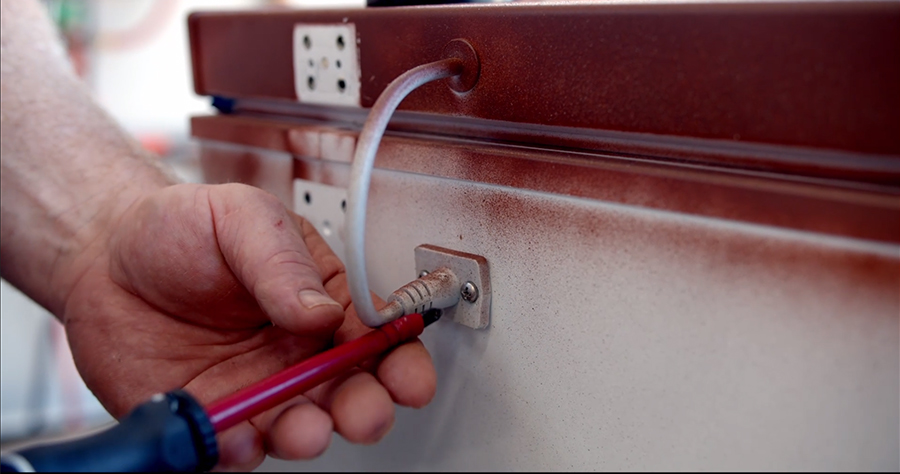
- See if your kegerator has a cord going into the lid, if so this is probably for a light. You will need to unplug this from the box. It may have a plug inside after you take off cover (see video above for an example)
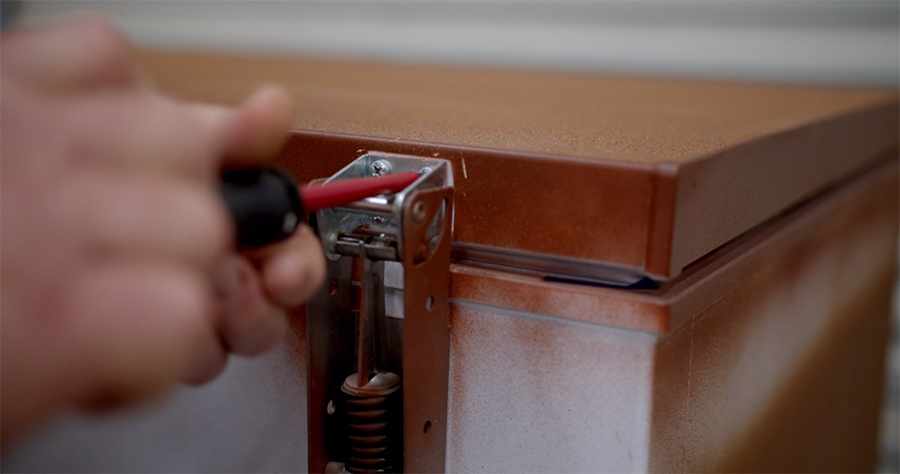
- Now you need to remove the screws from the hinges, do this on the bottom (on the box, not the lid). These have large springs, but if the lid is closed, they should be relaxed and not pop out when you remove the screws. Just be careful in case your unit is different.
- Now remove the lid completely from the box and set in a safe place.
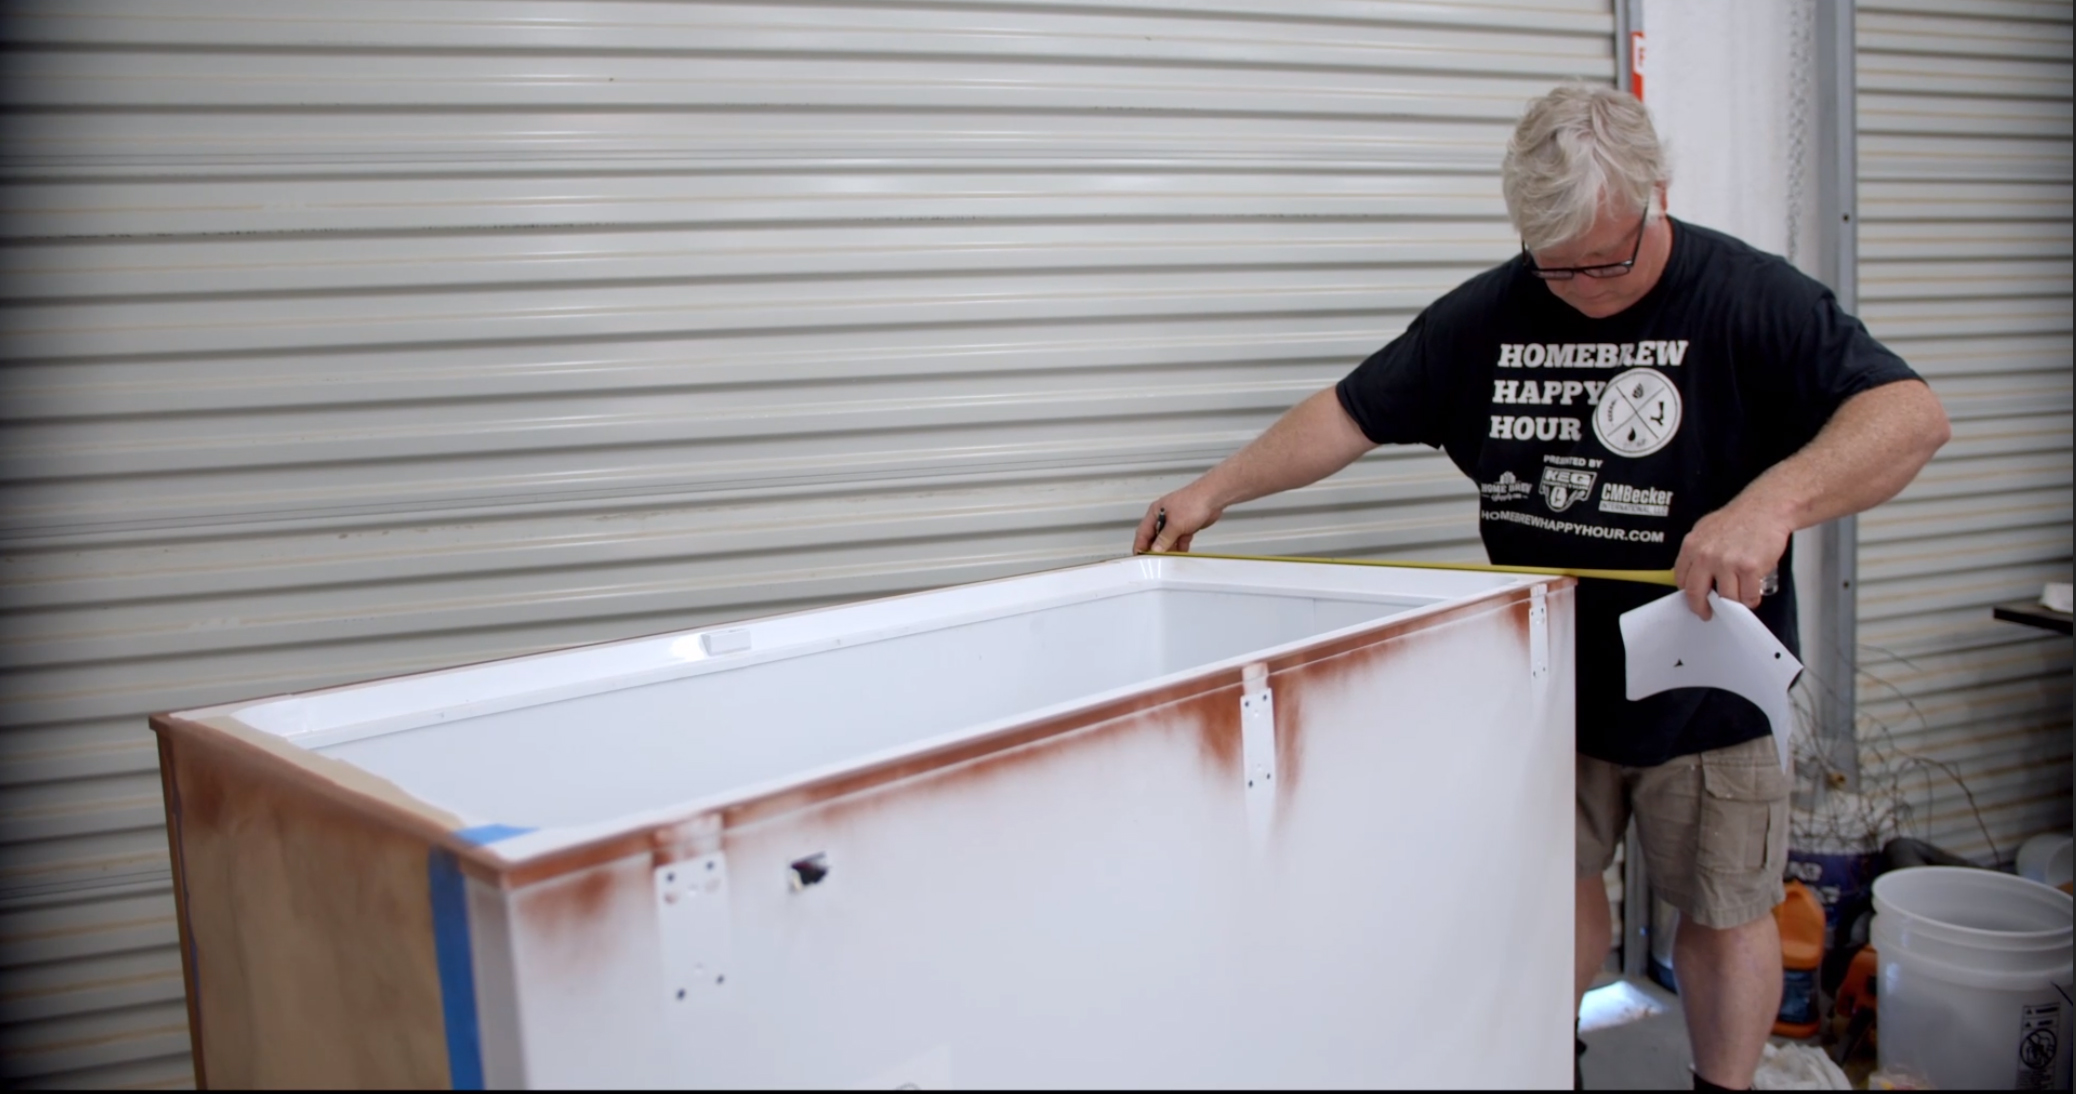
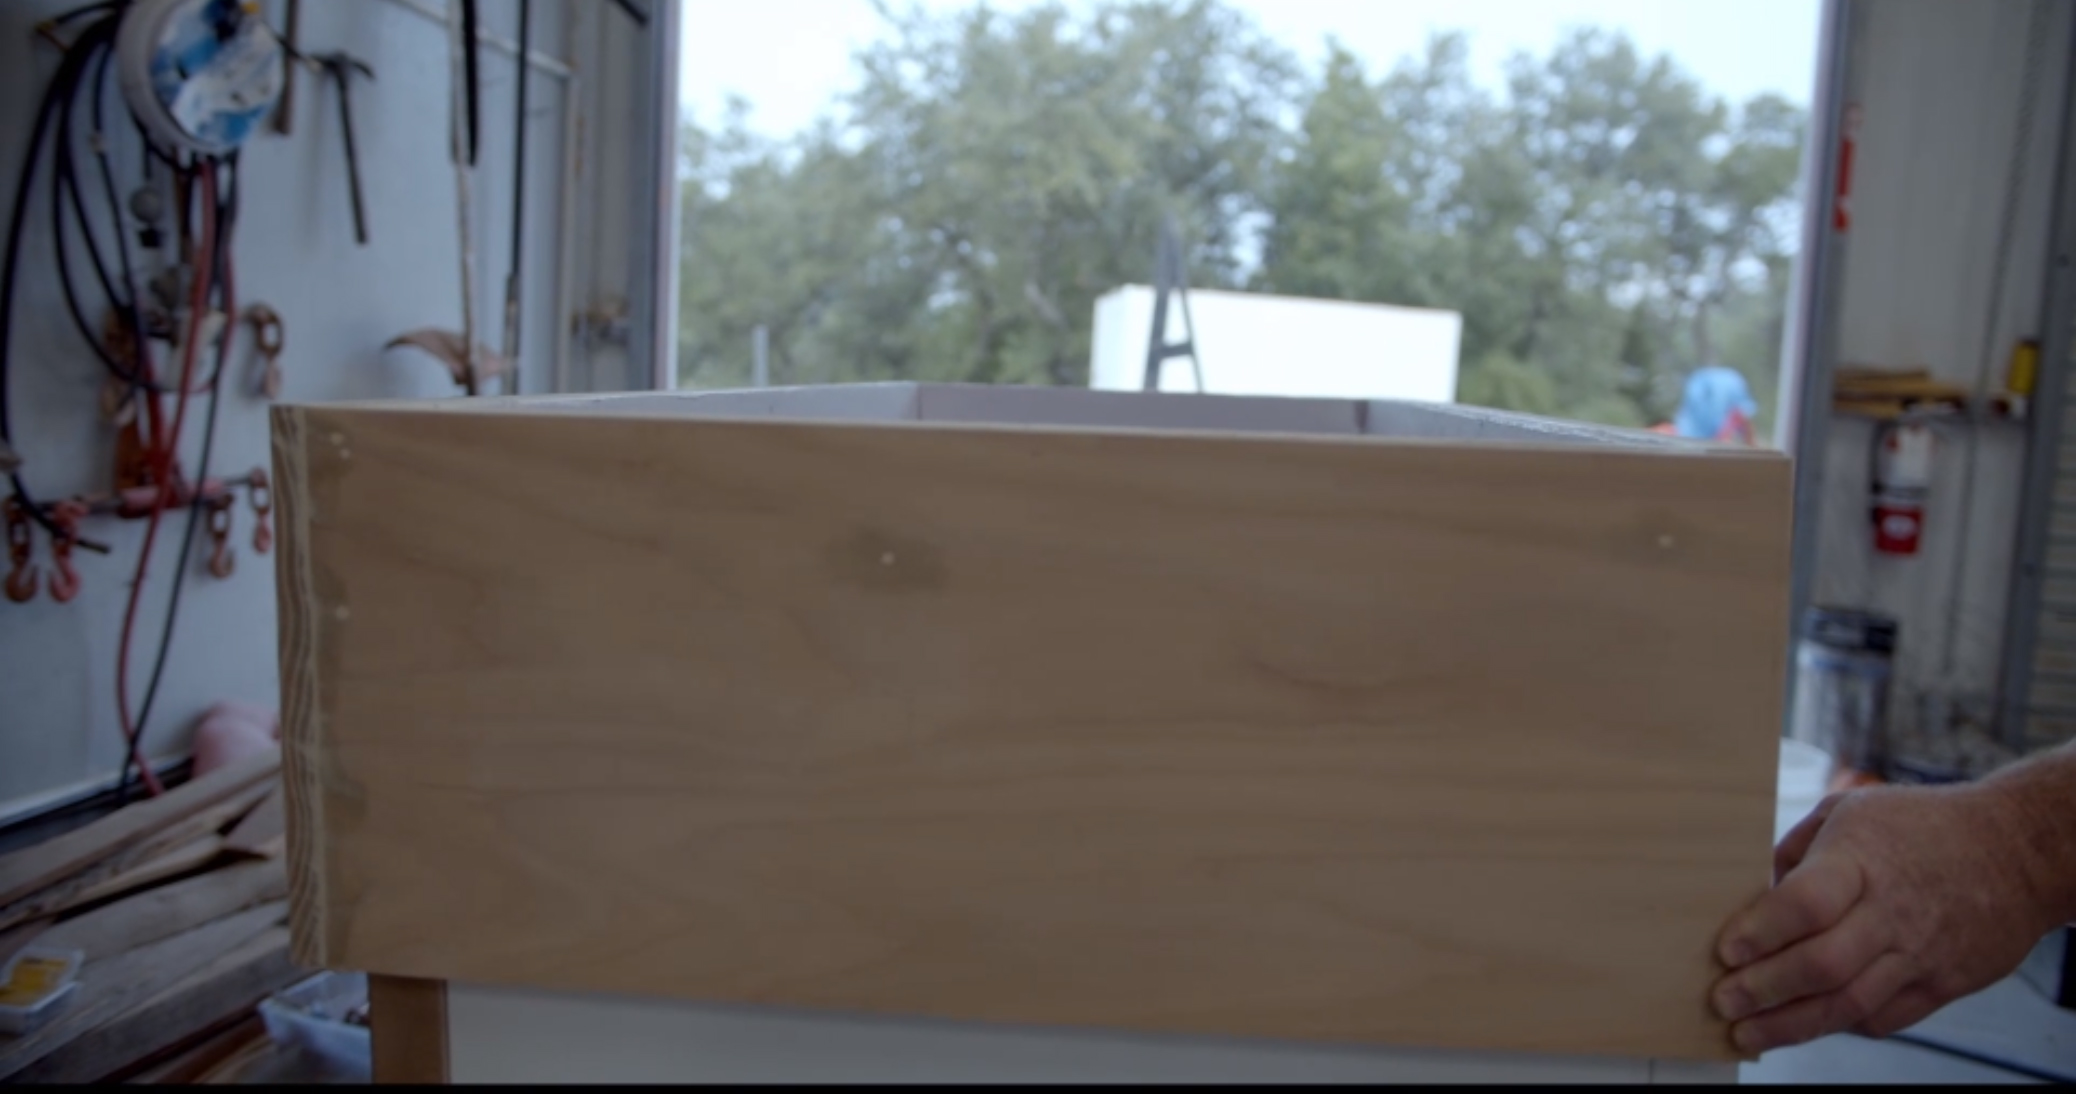
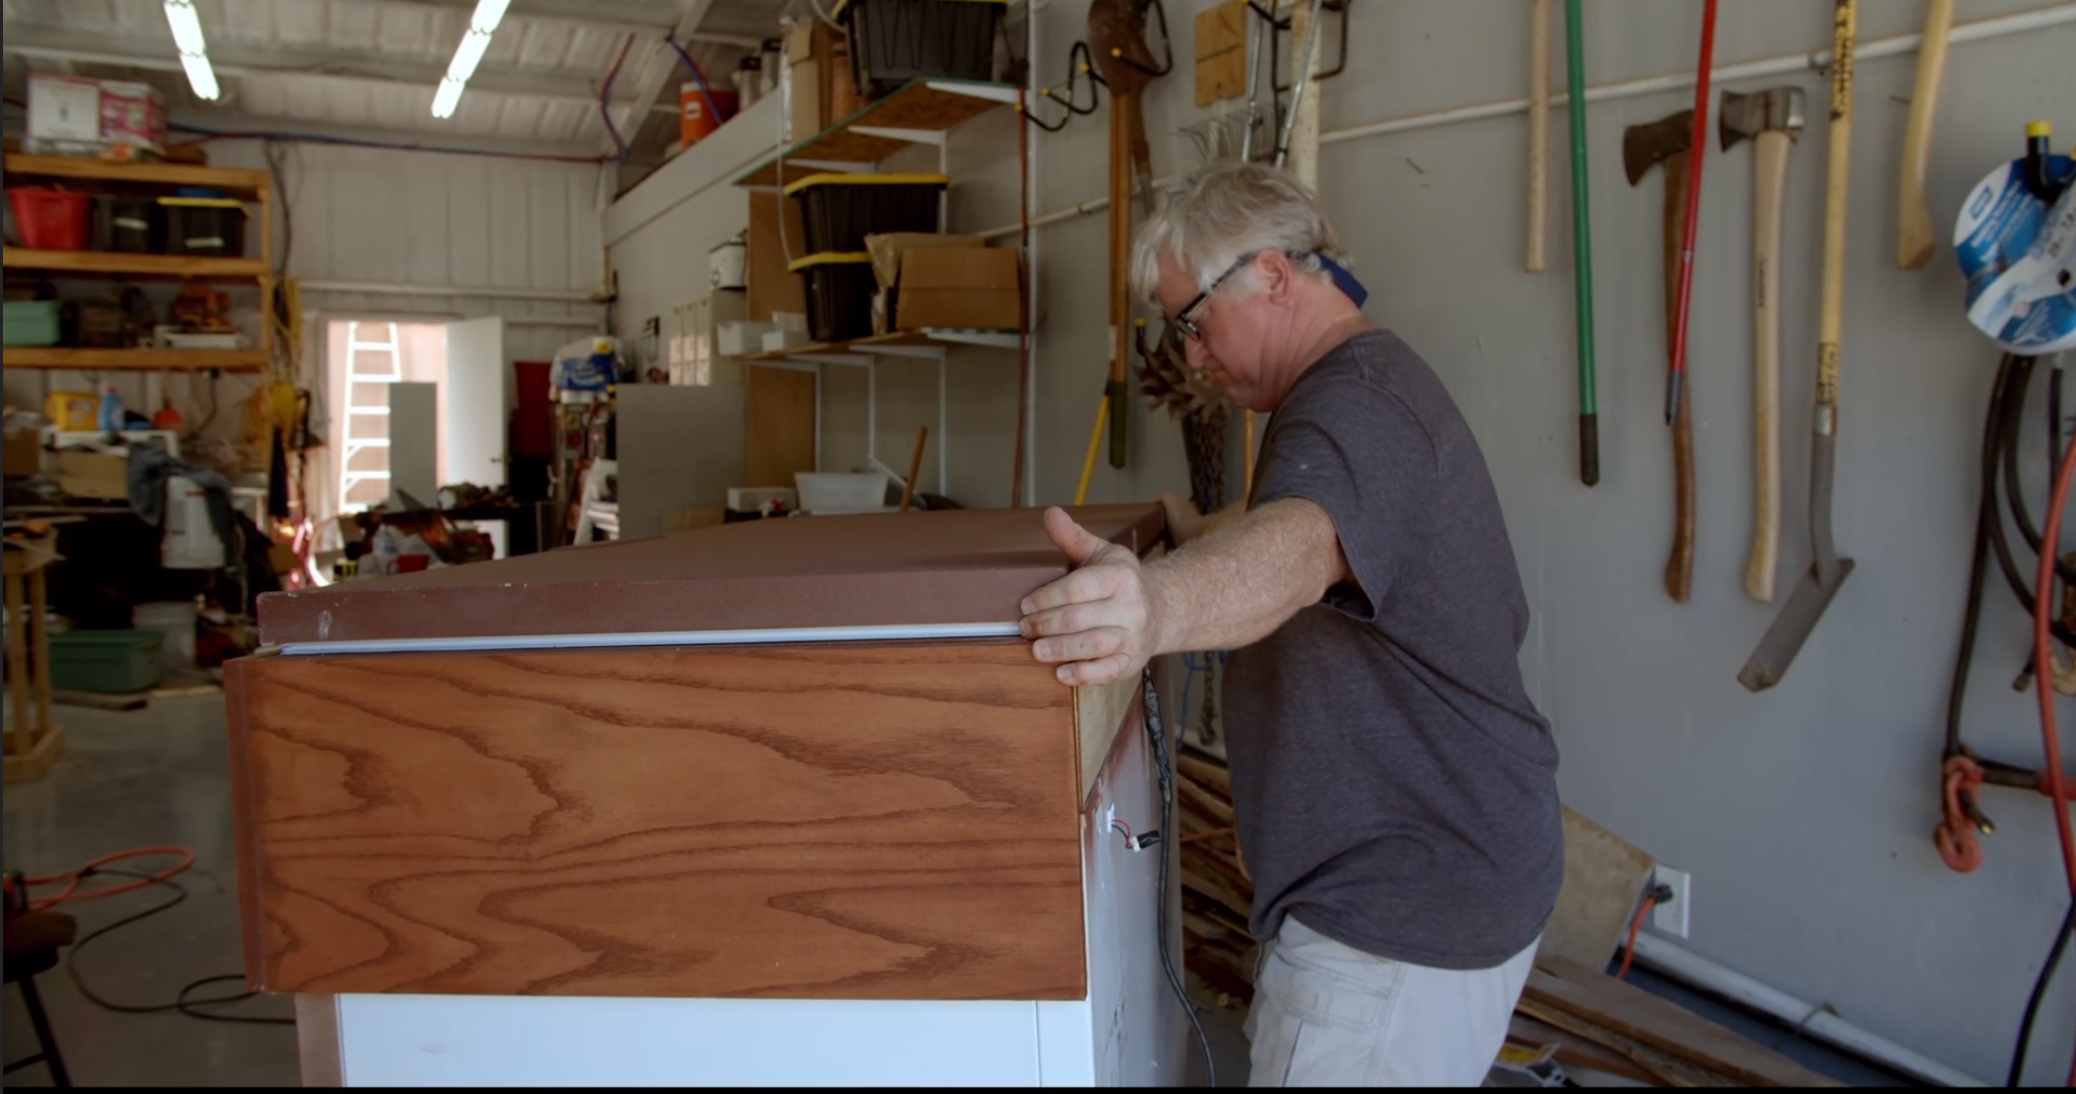
Now you are ready to build your internal collar and attach it to the chest freezer.
- Measure the length and width on the top of the keezer. You want the outside of the boards (2×4 or 2×6) to match up with the outside wall of the chest freezer. You want the longer boards to go to the end with the boards on the end fitting into the longer boards to form a rectangle. I will mention one more time that after you read this, please watch the video for clarification.
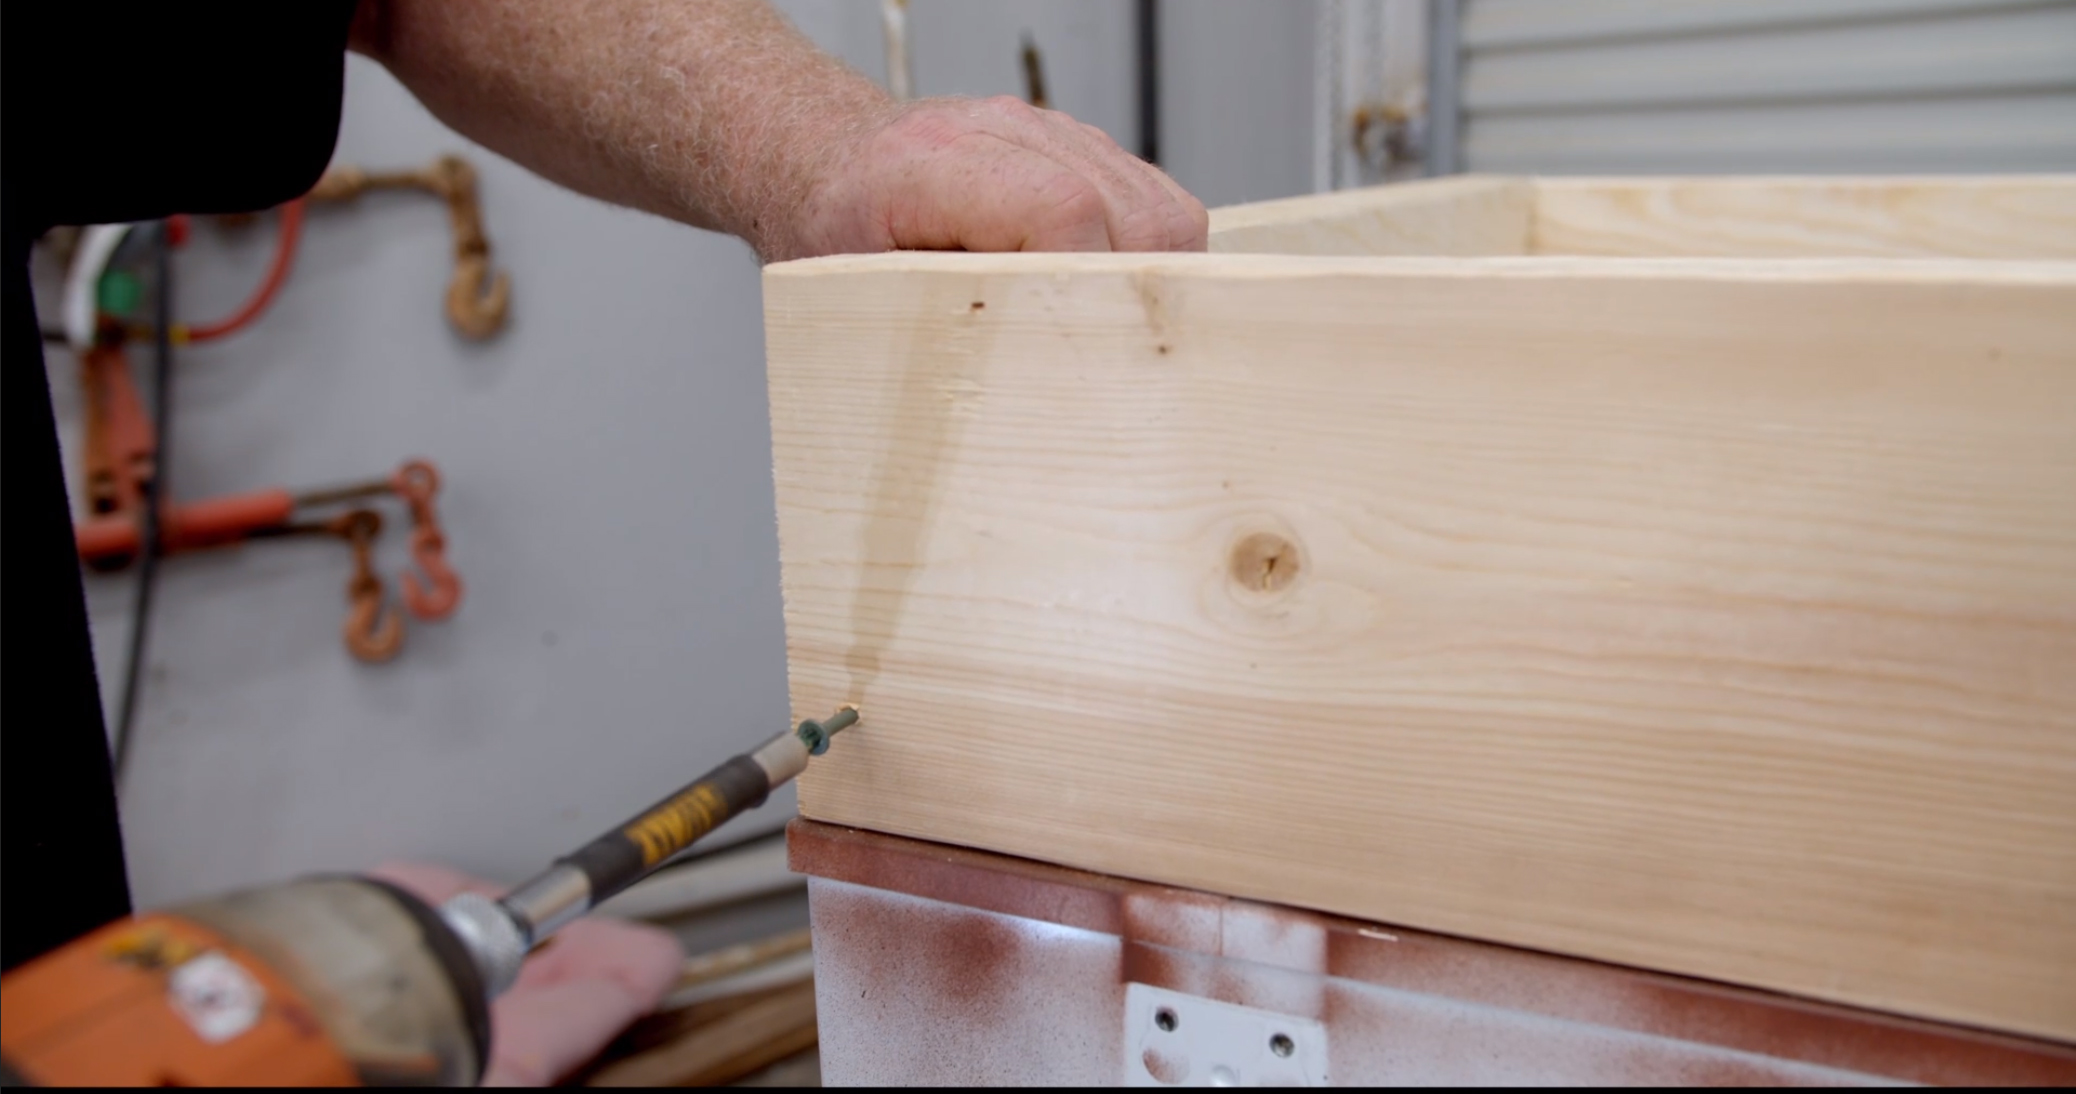
- Once the boards are done you will want to screw them together using 3 ½” outdoor decking screws. These are made to connect these types of boards and they are resistant to moisture, which keezers will produce. I always drill pilot holes before driving in screws to prevent the wood from splitting.
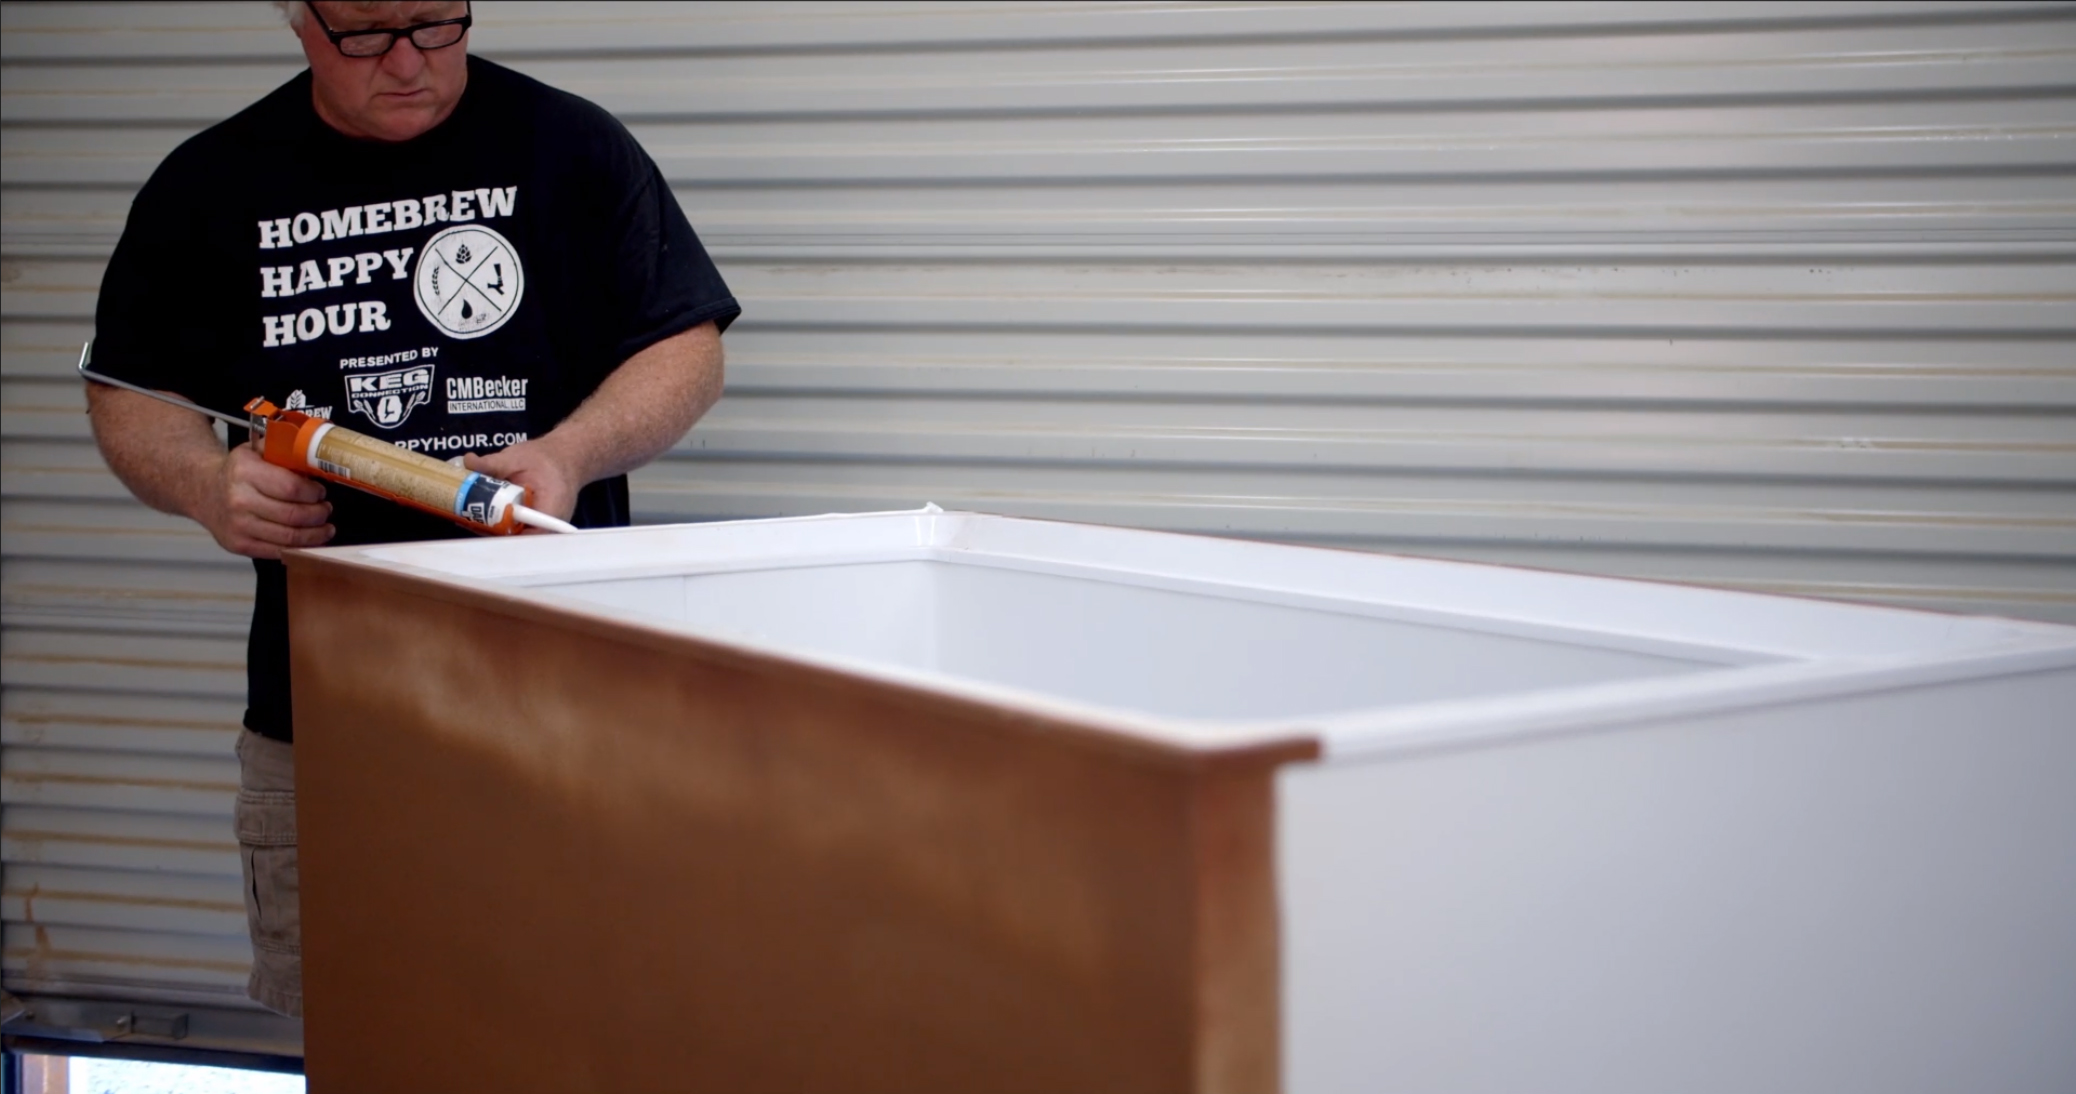
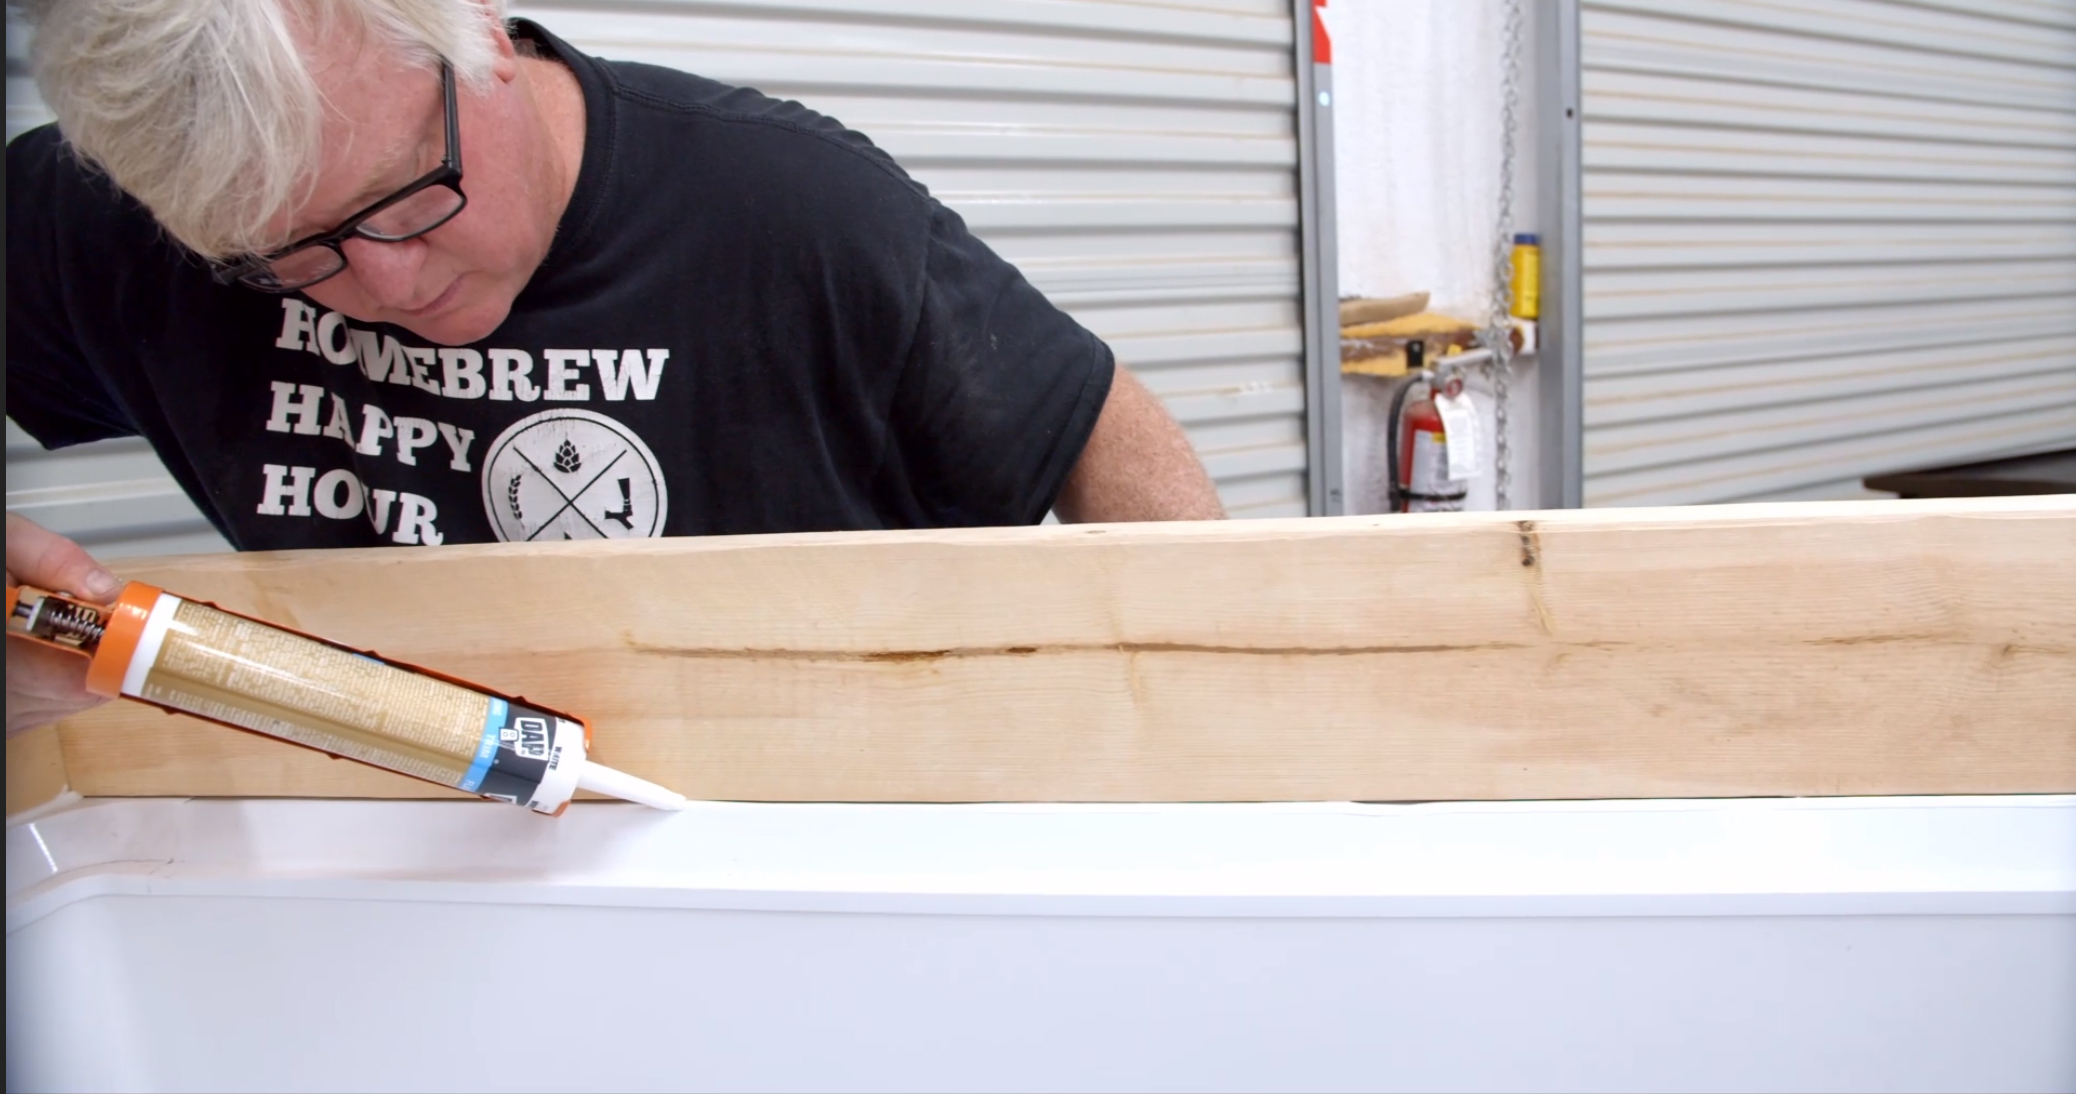
- Next you want to use a high quality silicone chalk and run it on the top of the walls of the keezer. Then lay the frame on the top of this. The silicone will not only seal between these two pieces, but also act as an adhesive. Make sure you are lined up on all side. It will squish out on the inside and outside, this is good! Use your finger to smooth it out on the inside and outside.
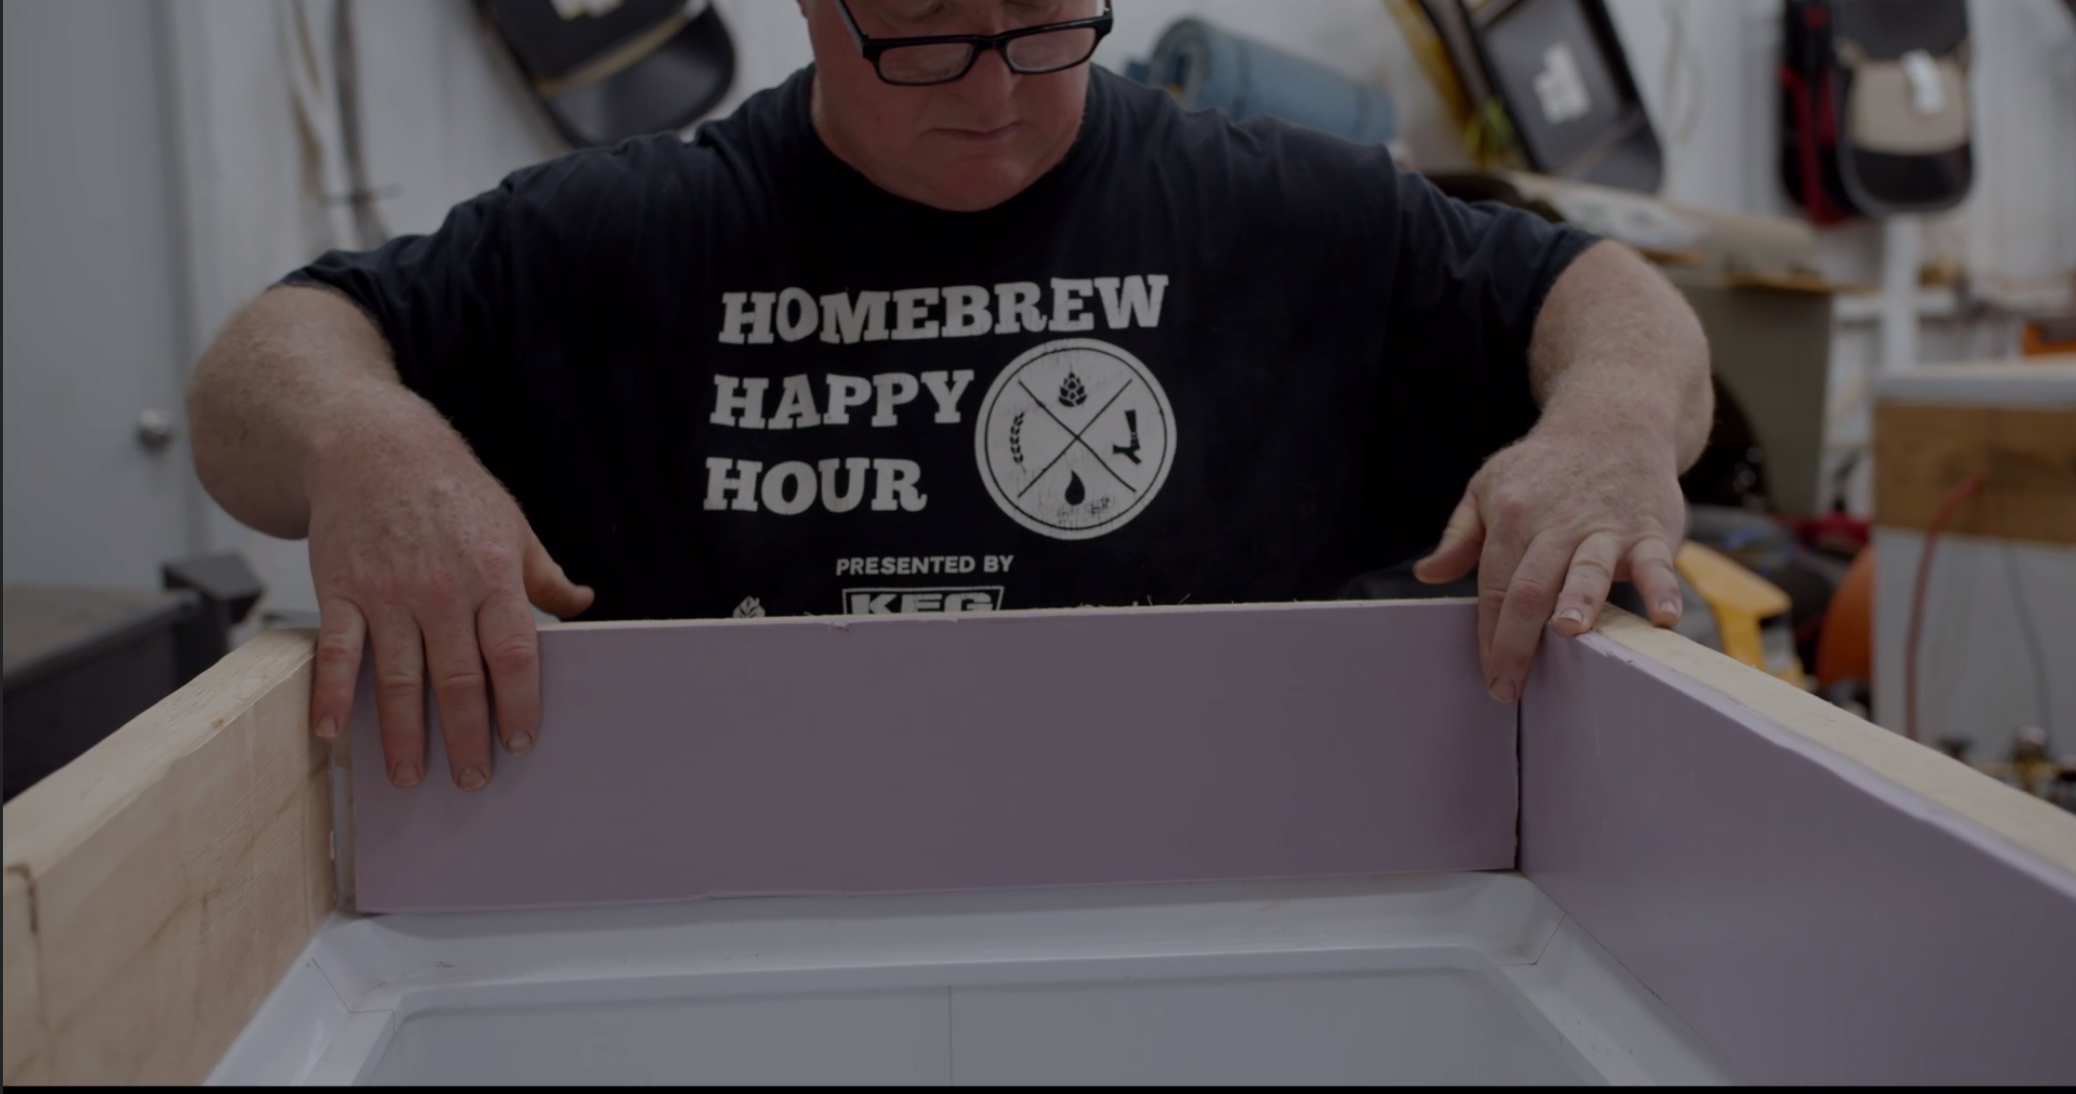
- If you are going to insulate your collar it is not time to cut your foamboard. Once you have it attached (using foamboard adhesive and clamps -see video) you can also use some of the adhesive or your chalk to finish the edges. You can also use a high quality house paint to paint the board, this makes it not only look better but it also serves as a moisture barrier.
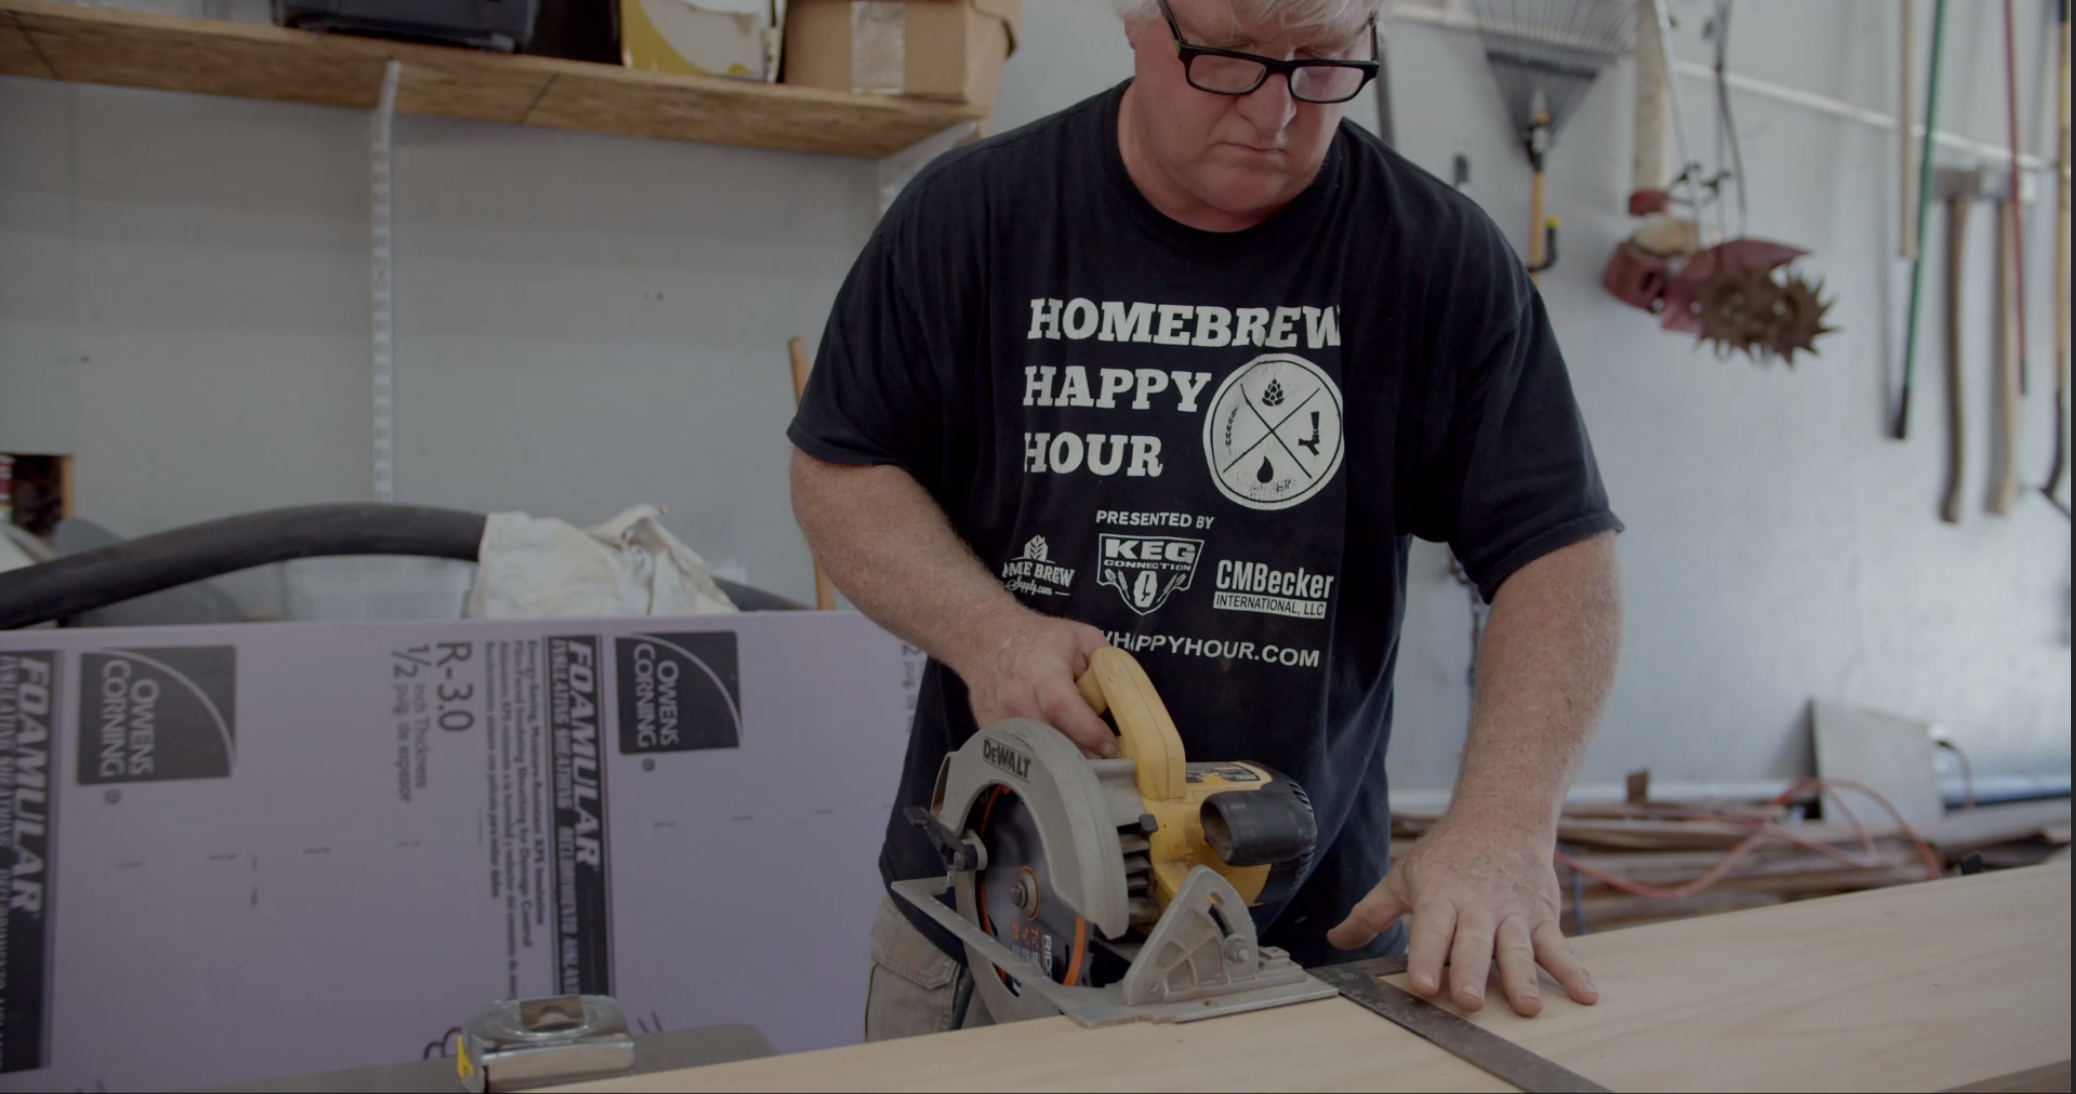
Next you need to build and attach your 1” trim board. Your trip board is what people see when they see your Keezer. This board defines your keezer. I like to use a nice oak or some other hardwood for this board. In our example we use a 12” wide board. This is because in our build we wanted it to also support the drip tray. Many people use a board that is only 2” wider than your frame boards. This is a personal decision.
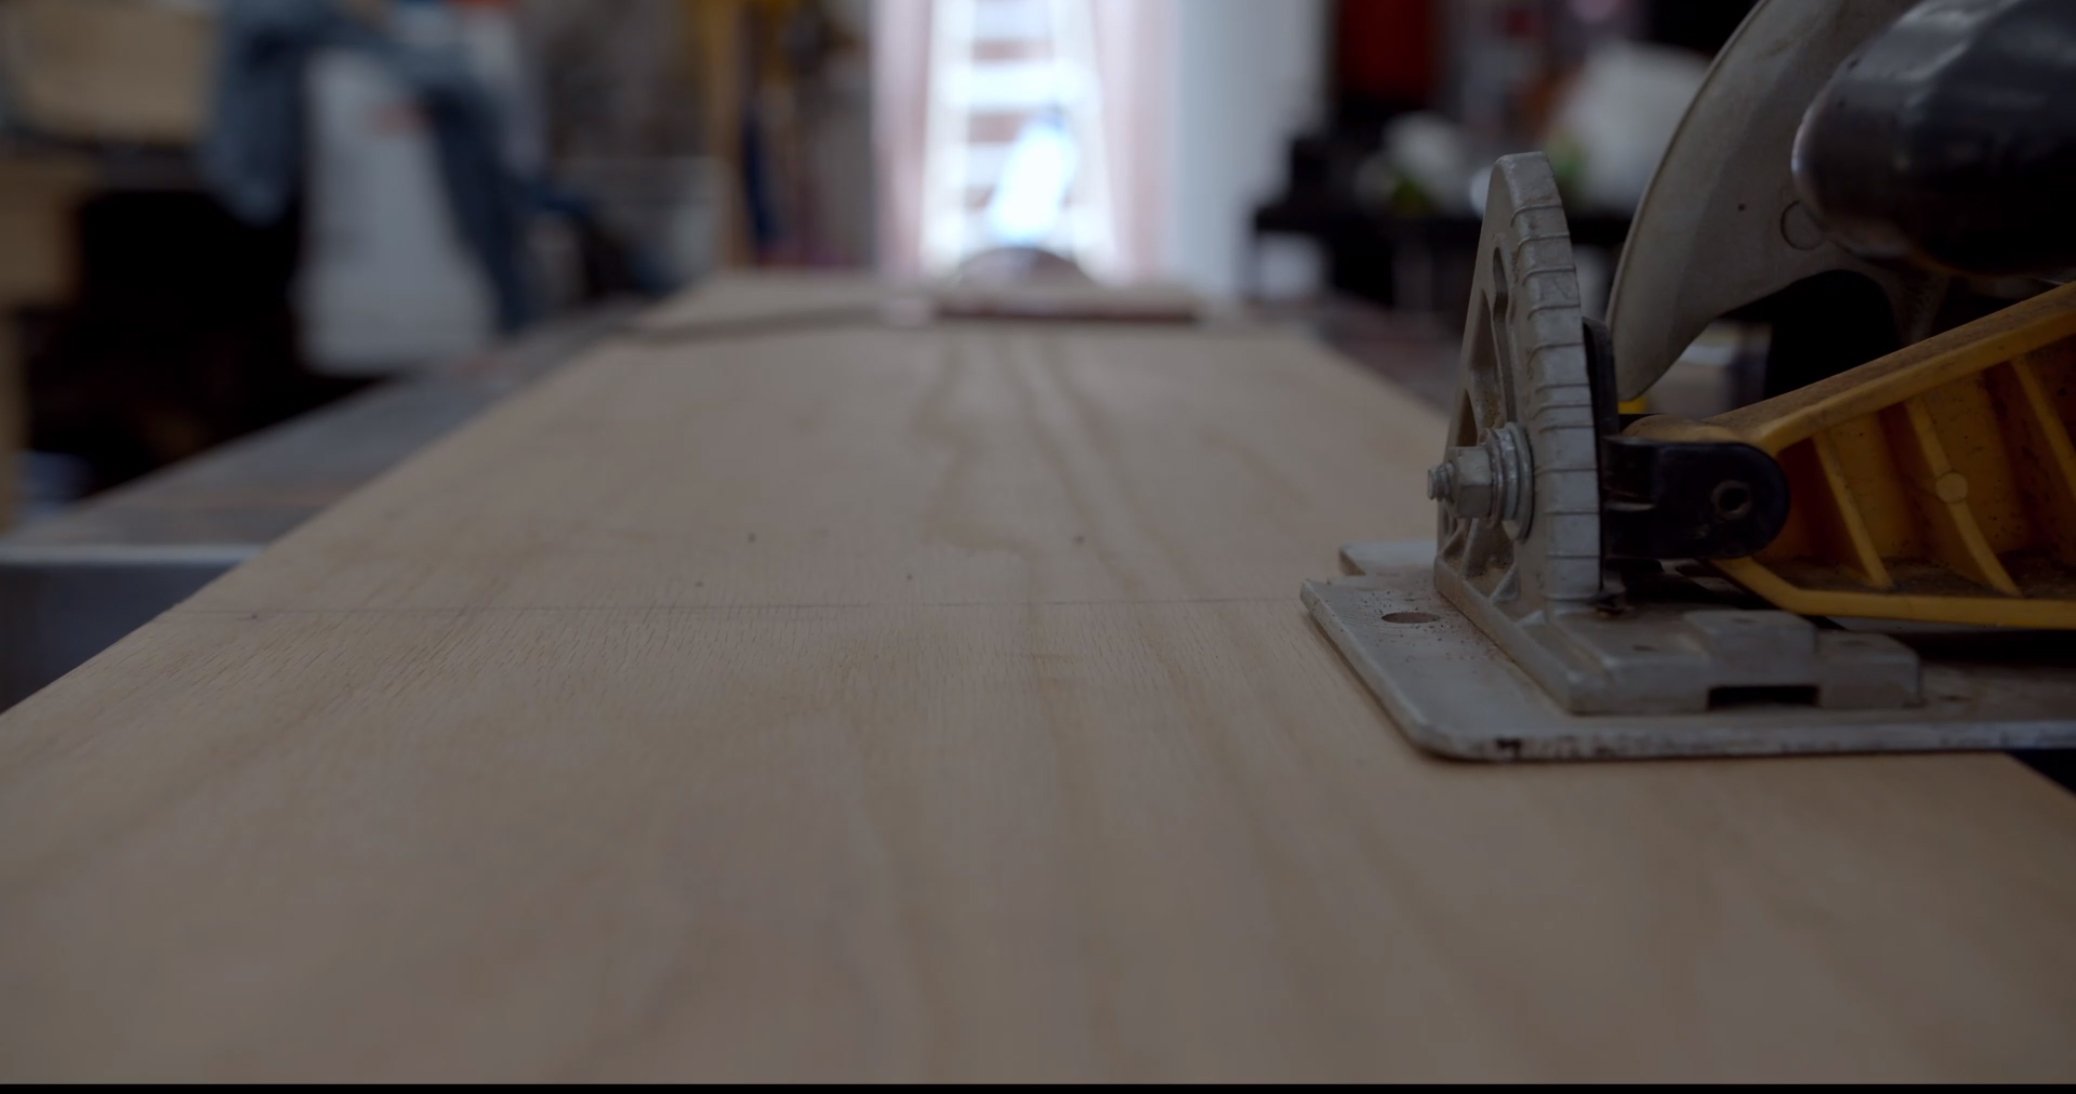
- First carefully cut your boards so they will fit over your frame boards in the front and on both sides. You do not need a board on the back. Make sure the board on the front has enough overhang so the sideboards fit flush against it.
- Attach your boards using glue and finish screws (or nails). You can just glue it, but I highly recommend screws, so it does not work loose over time. Remember, this is the main part that holds your collar on your keezer. This locks it into place! You can fill in the holes left by finish screws with putty and they will not be visible after you finish the wood.
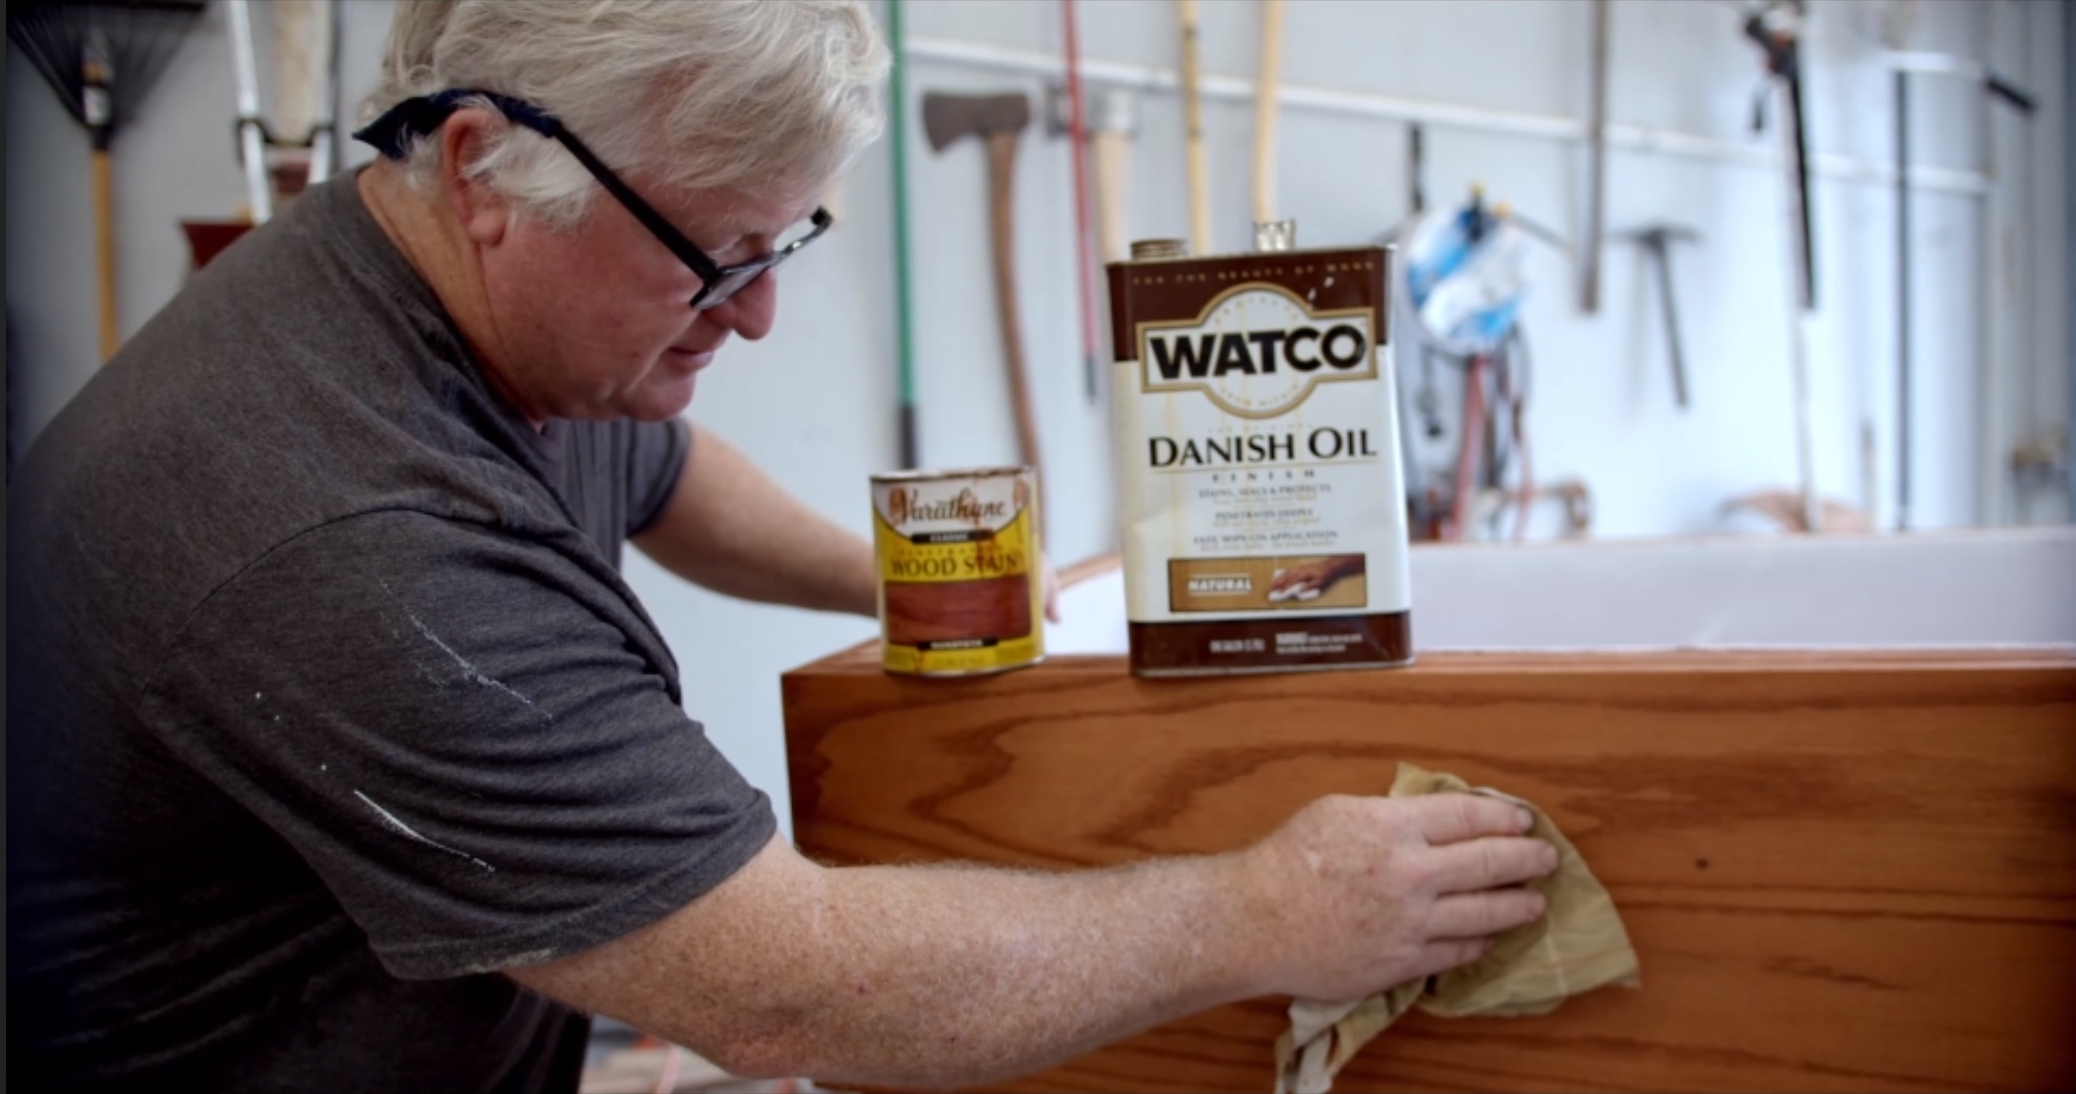
- Now it is time to finish the wood. You use stain or leave it natural. We did the final finish with Danish Oil, but you could also use a Polyurethane finish. I like the fact that you can reapply Danish Oil right over the original coat anytime you want to “revive” the finish.
Cutting hole for shanks, with or without drip tray.
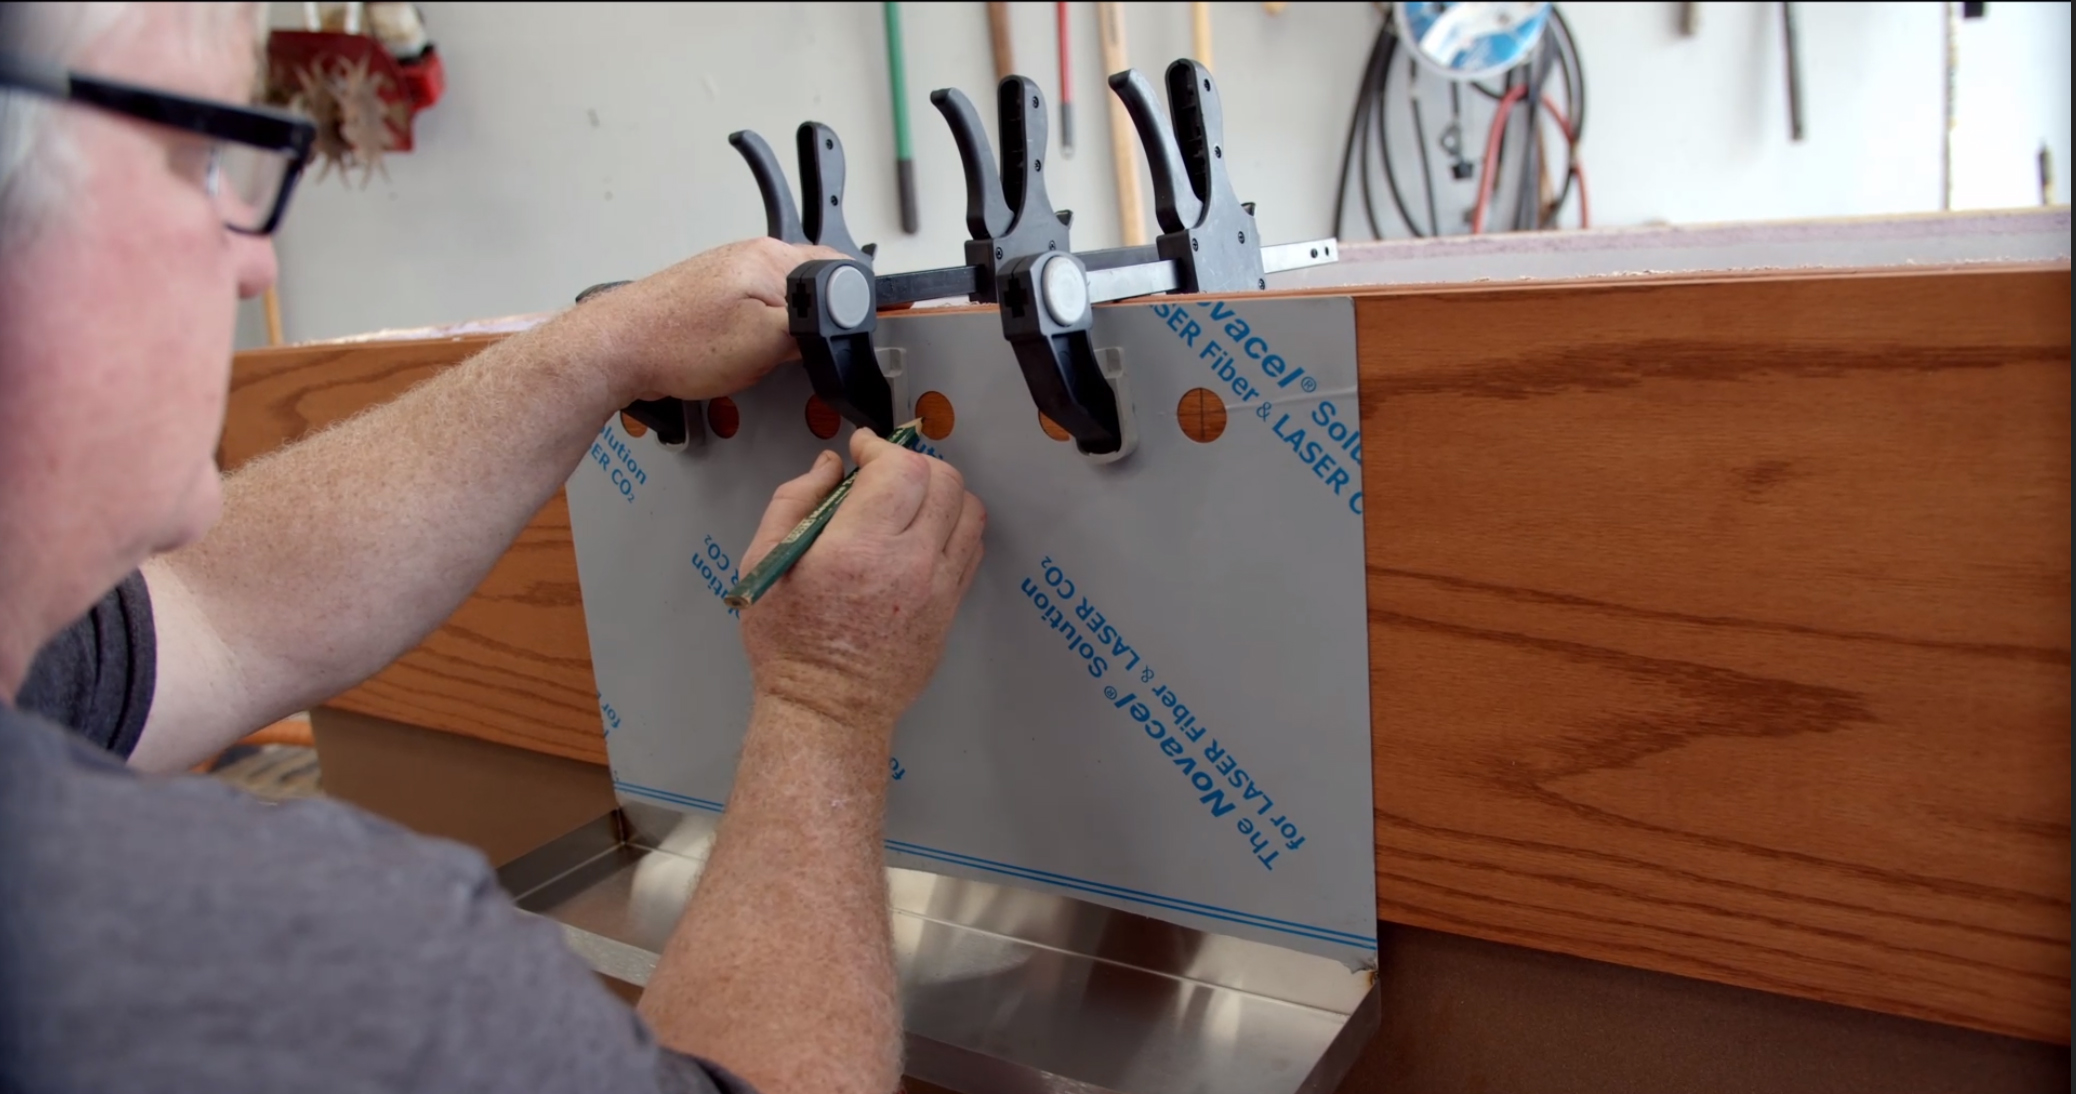
Before you drill out the holes, you need to decide what type of drip tray you will be using. If you are using a drip tray like the one in the video (Click here to see a four faucet version). This decision will determine how you drill your holes.
- Drilling holes with high walled drip tray – Use clamps or a friend to hold drip tray in the front center of collar. Then mark center of each hole. Remove drip tray and drill holes using your 15/16 hole saw. The shanks themselves will hold drip tray on, there is not need to use additional mounts. You can add the shanks now and have them ready for the beer lines!
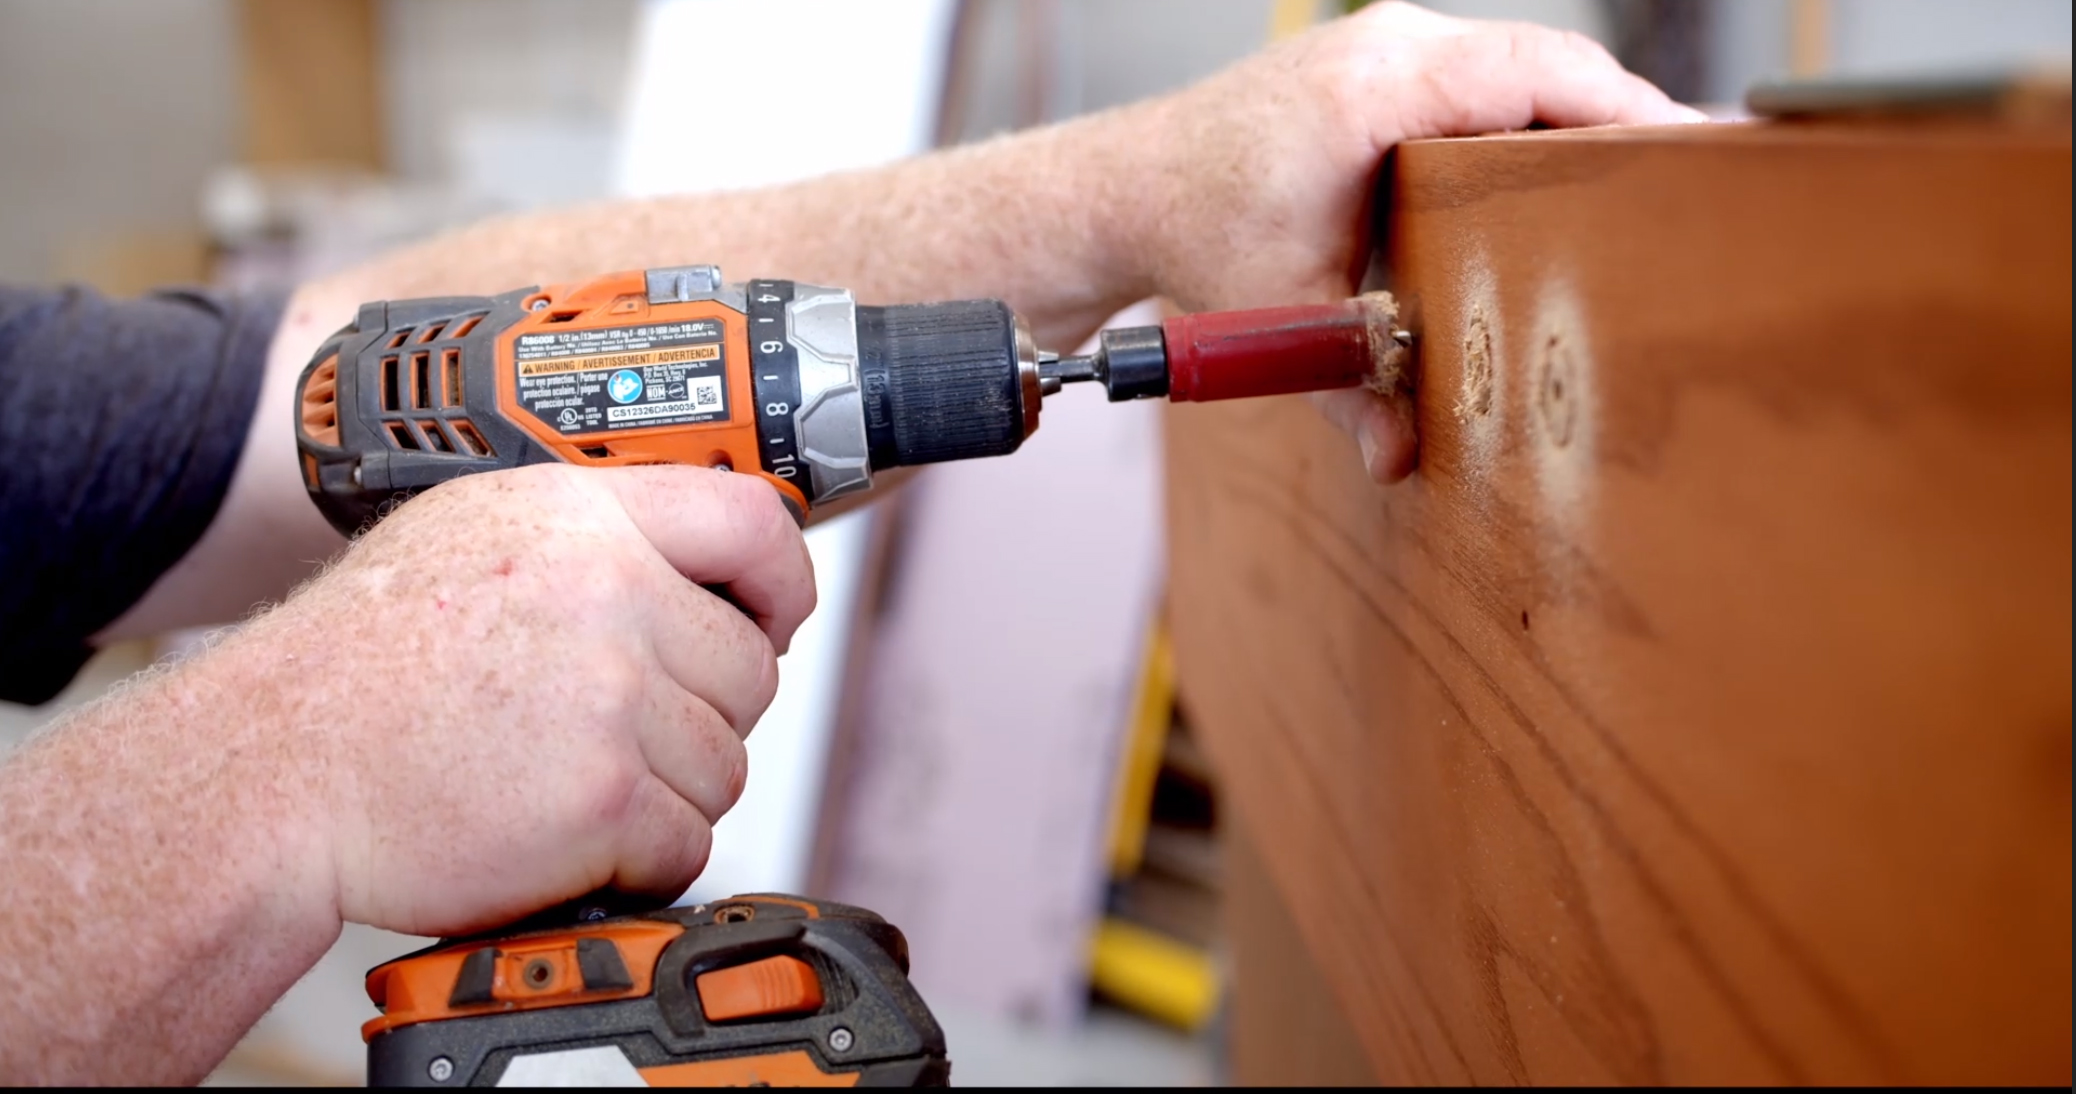
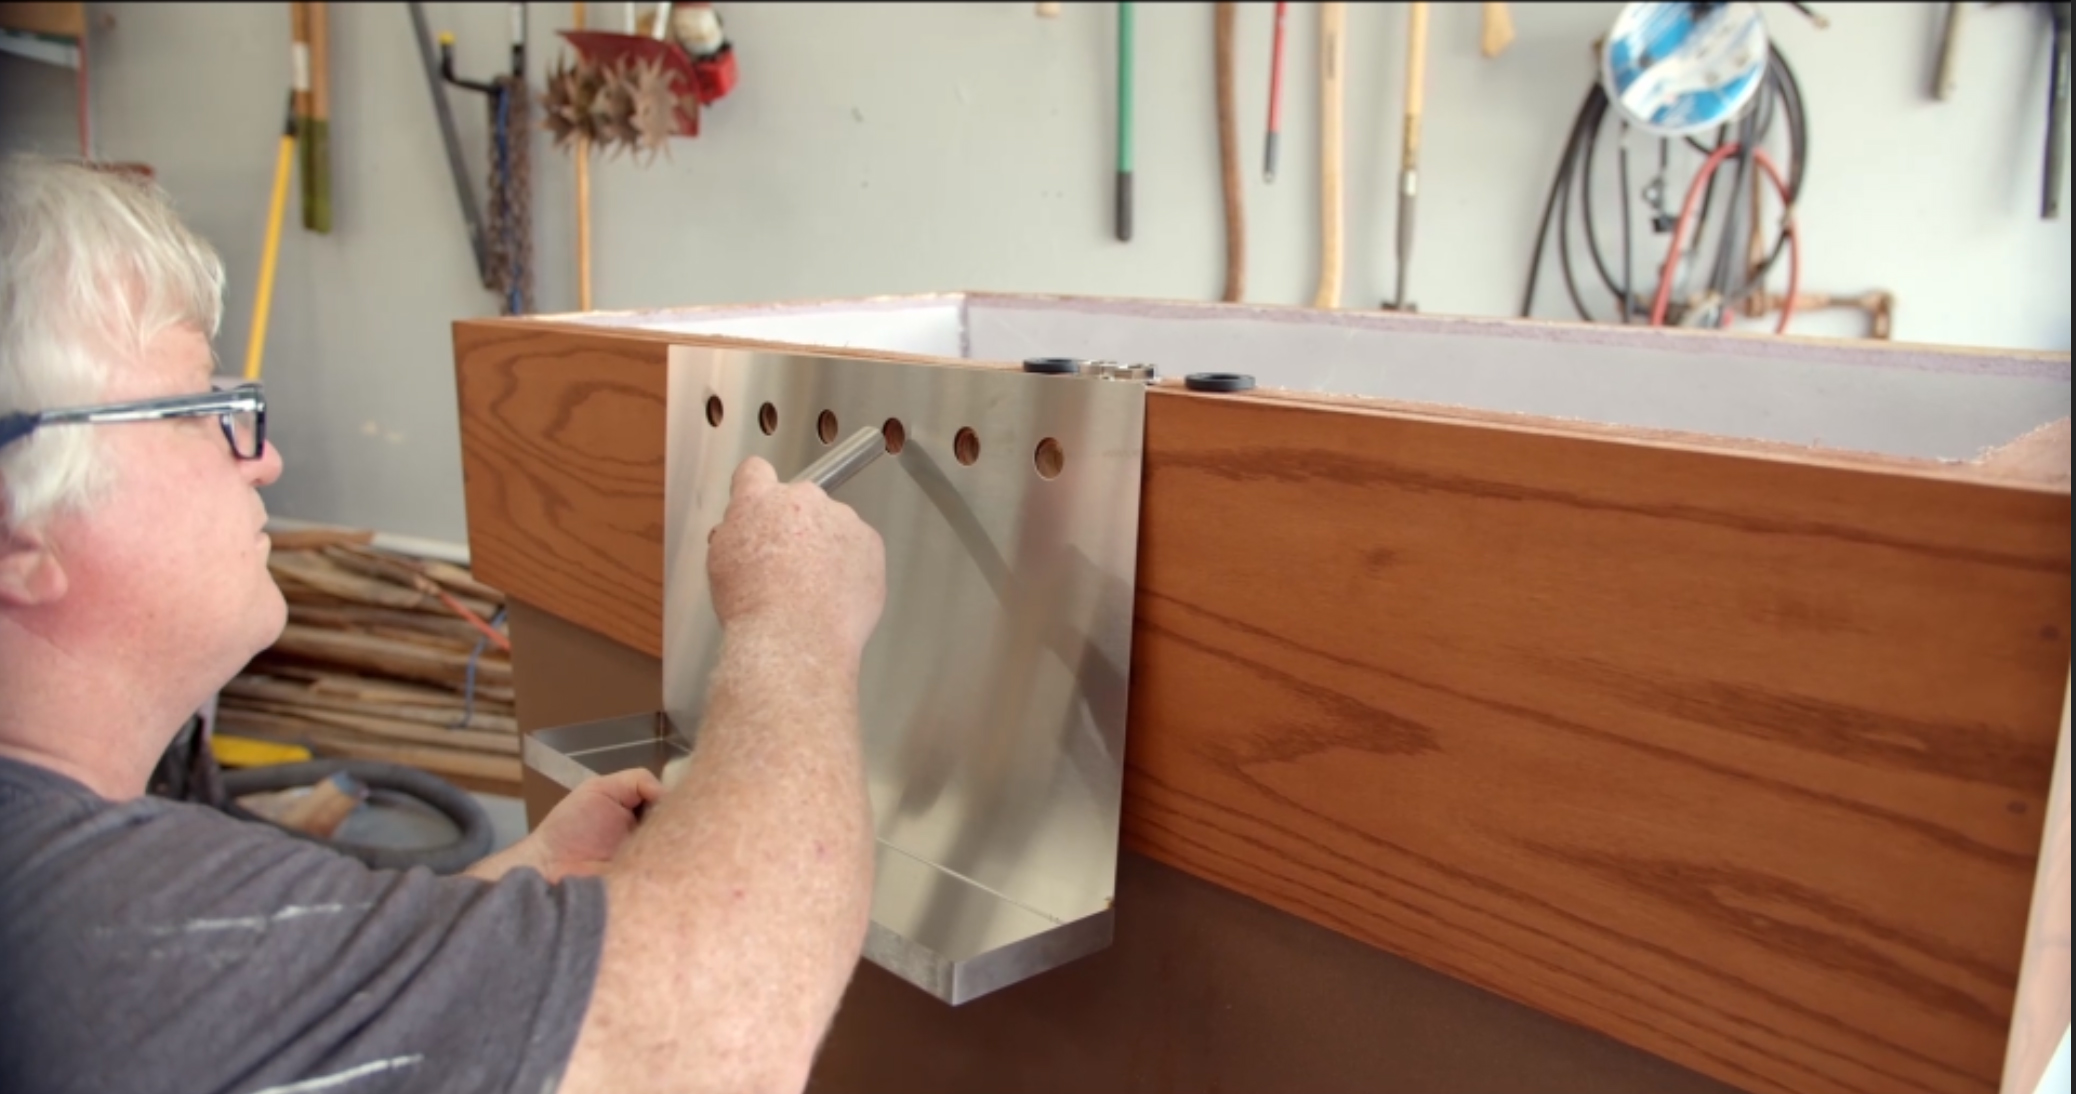
- If you are not using the drip tray you will need to Drill holes in line with where you want them on the board. They are typically spaced 3” from center to center. This is particularly important if you want to add a drip tray in the future. Once the holes are drilled you can install the beer shanks so they will be ready for beer lines in the next steps.
Adding beer lines, gas lines and other hardware.
- Now you can add your beer lines to the shanks. These will have come assembled when you ordered them, so just put the black washer in the beer nut and screw the nut to the end of the shanks. The other end should have disconnects (or a coupler if you are dispensing commercial beer) and they are ready to go. You may want to label which line is for what tap, for easy tap identification in the future. I used numbers from left to right.
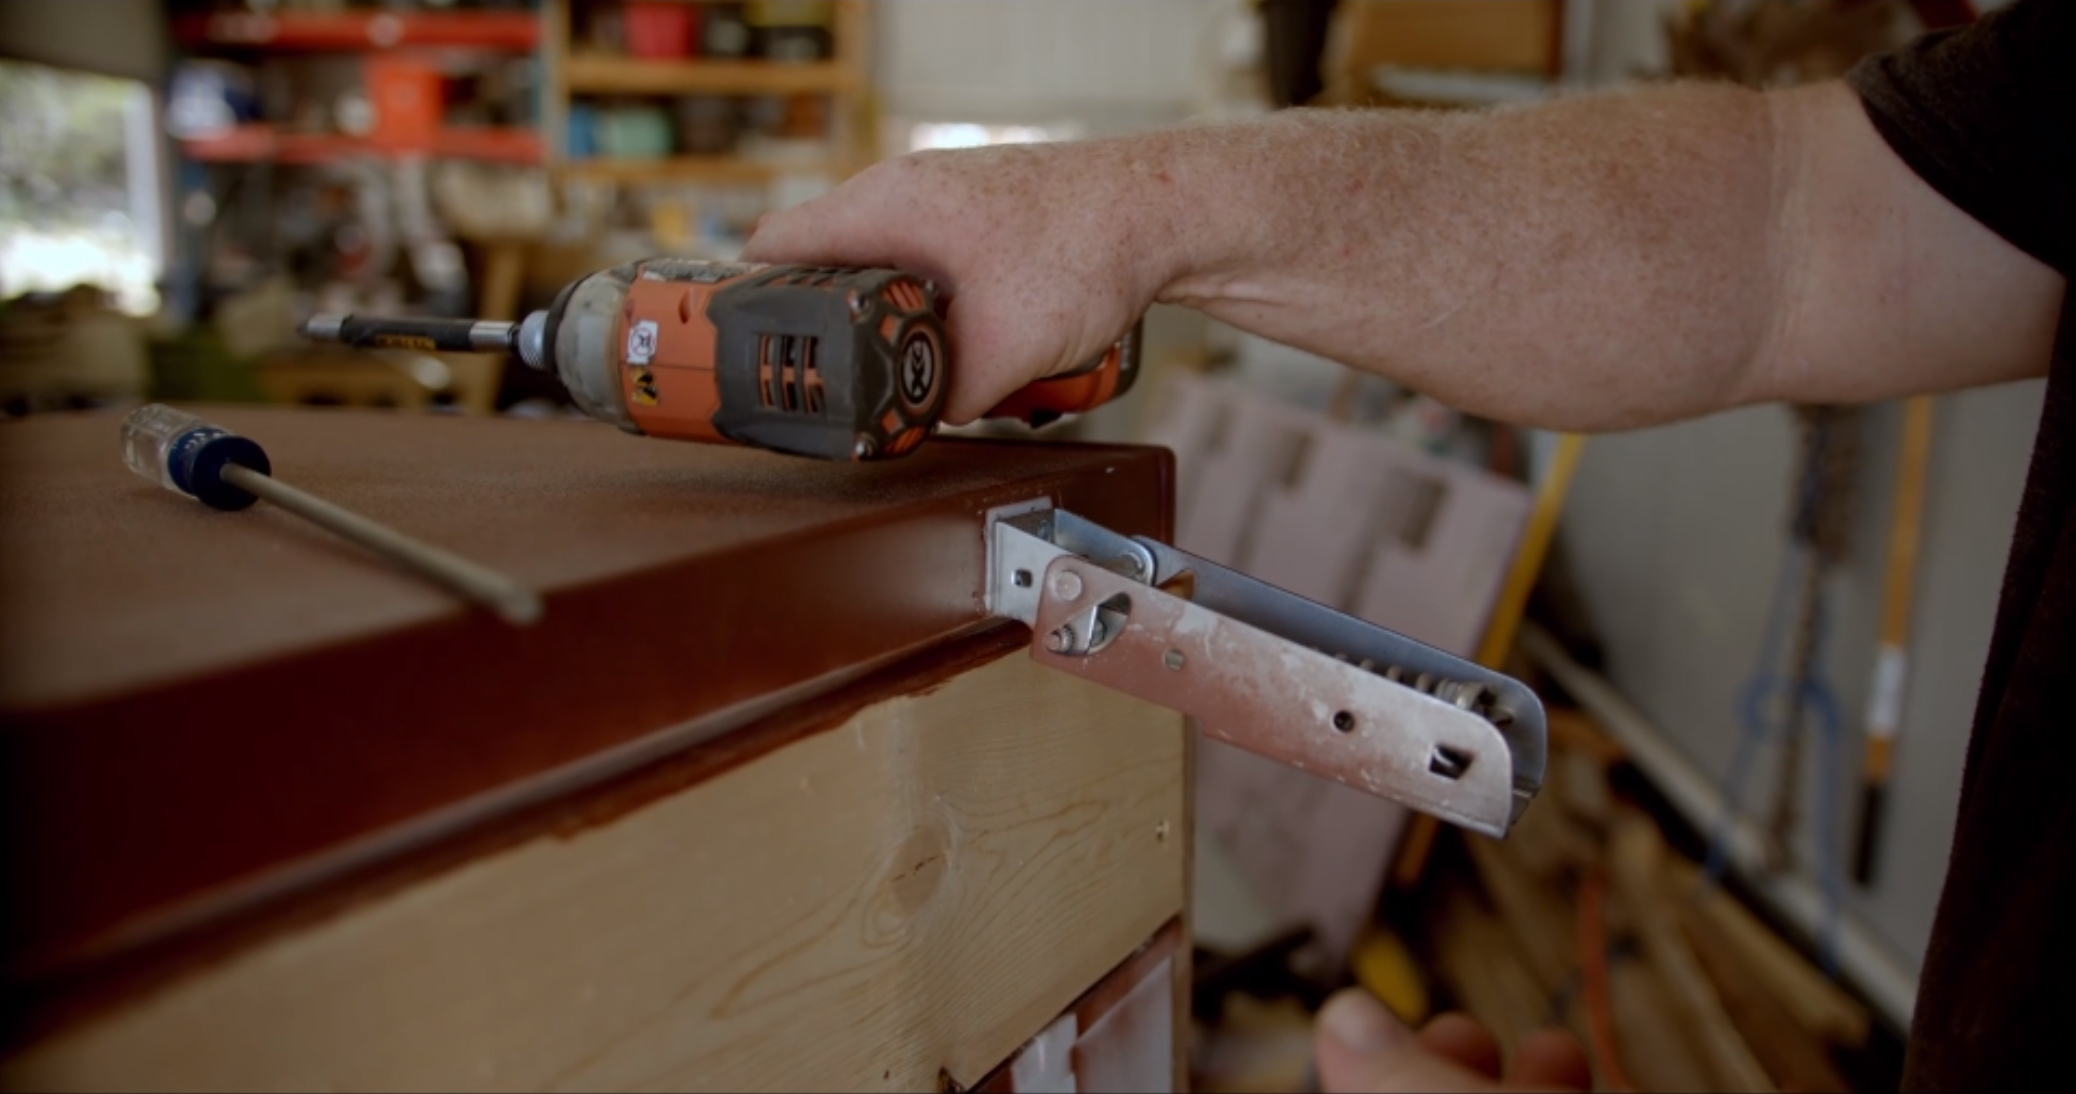
- Now you need to place your regulator and CO2 cylinder in the Keezer and mount your air distributor. Do NOT screw into the sides of the Keezer when you mount your air distributor, screw into the wood collar. The sides could have coolant lines and if you hit one you will need a new chest freezer.
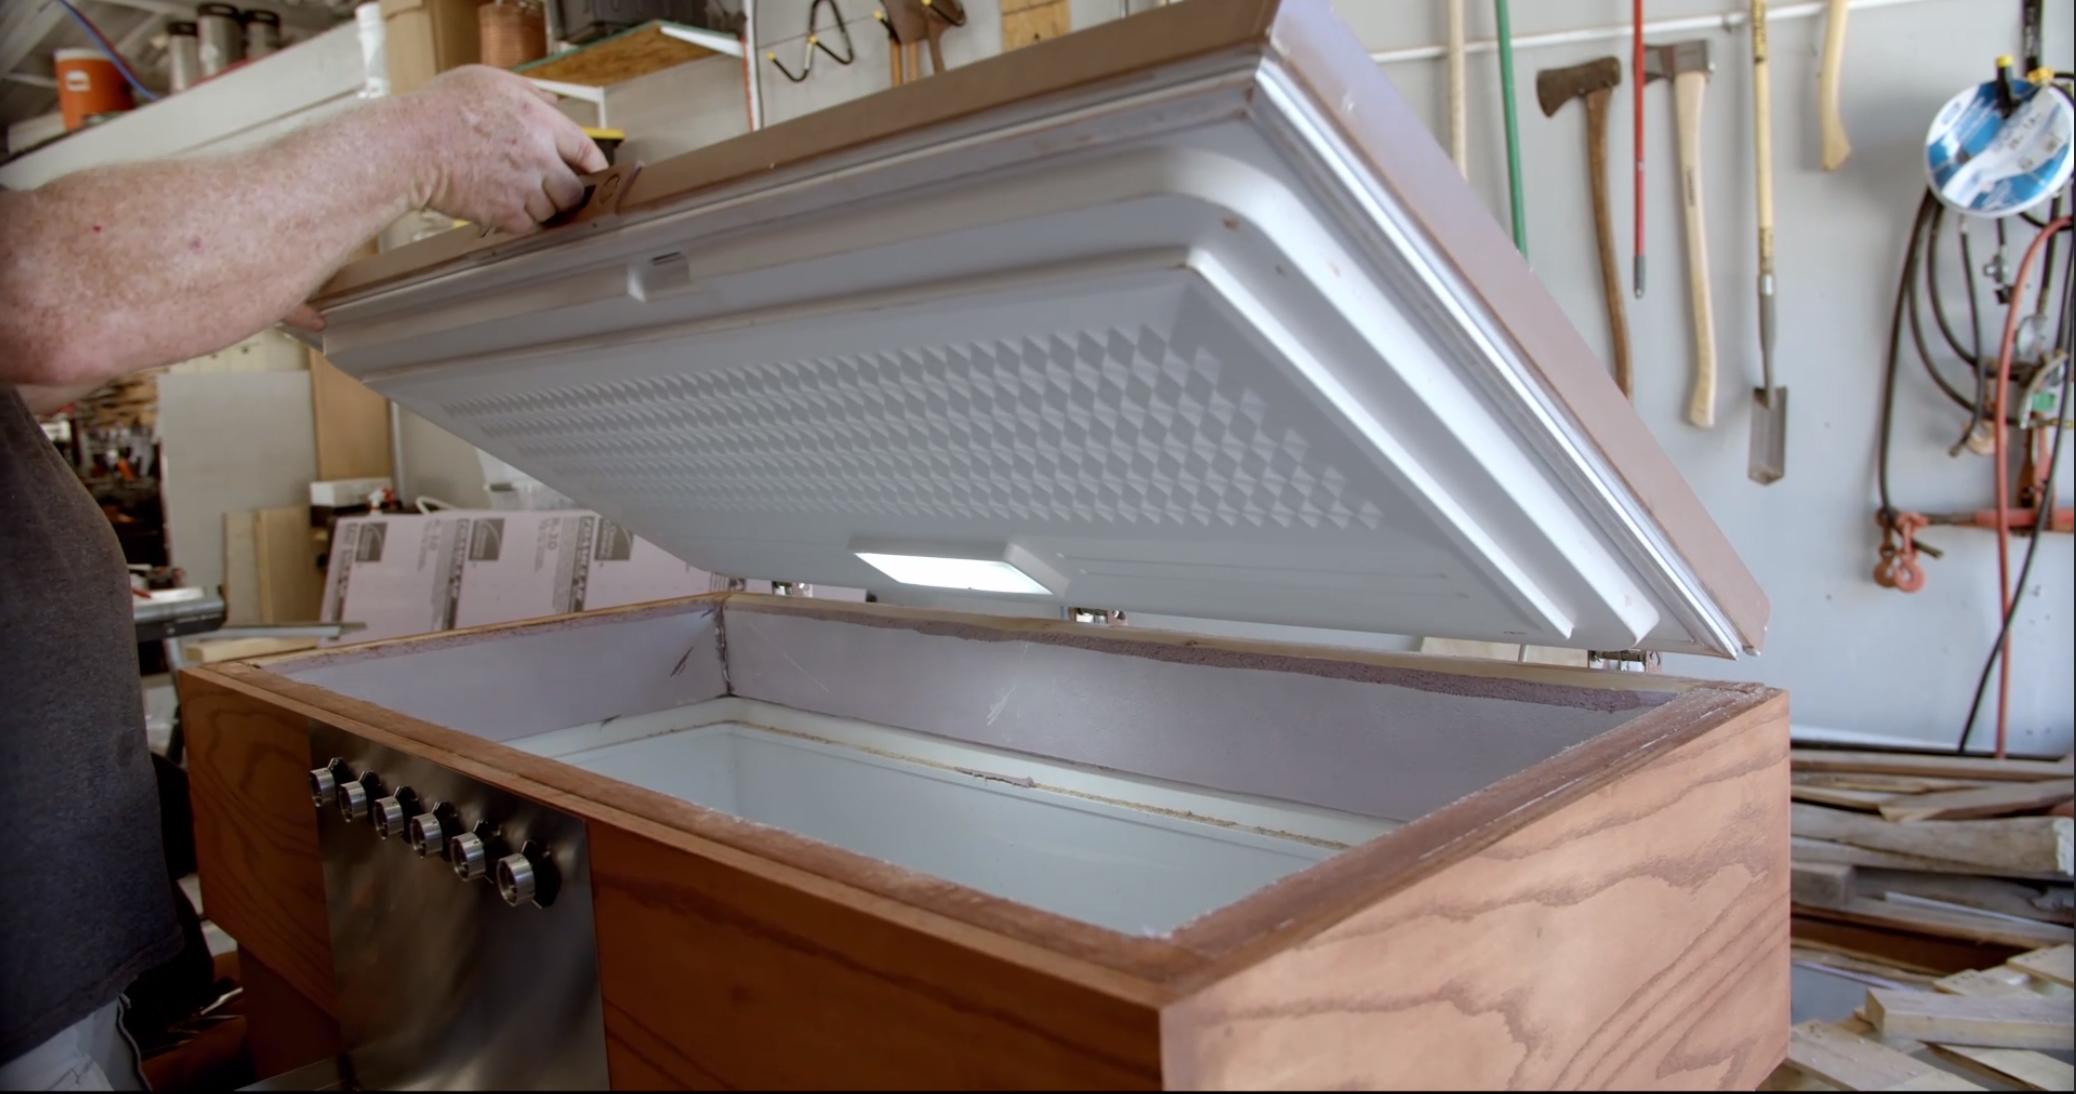
Reattaching the lid
- To reattach the lid you just have to line it up and screw the lid onto the new collar. Pushing the hinge down can be challenging, It is helpful to have a friend hold this down while you screw it in.
- The light – if your chest freezer lid came with an internal light, you now must decide that to do with it. Remember that many of these have an internal switch that turns the light off and on as the lid is open and closed. This means that it just needs electricity to work. However, keep in mind that the electricity operating your unit is being cut on and off by the temperature controller. This means that you need to make a separate cord ( you can buy this at a hardware store, premade) that plugs directly into the wall. Another option is to just put wire nuts on the wires and don’t connect them. This means you won’t have an internal light, but it is actually easy to see inside the keezer with light from the room. If you do not have electrical work experience have a certified electrician, make a cord for you.
Have questions? Contact us at [email protected] and we can assist you.
Have you enjoyed this article? Please visit us at www.homebrewhappyhour or download our weekly podcast on your favorite podcast app. Have a question or suggestion for improving this article? Email me: todd AT homebrewhappyhour DOT com
Homebrewing is our passion and we are here to help the homebrewing community.