It’s the most wonderful time of the year! The best deals on homebrewing equipment, gear, ingredients, kits, and more are happening right now as Black Friday and Cyber Monday are upon us. In this quick video, HomebrewSupply.com ‘s Ladik Joe Ermis briefly goes over some popular choices and his personal recommendations for gift buying this season. If you’d like more info on any of the products mentioned in this video, check out the links below or give Ladik a call @ 866-936-8582
Thank you for joining us for this week’s episode of the Homebrew Happy Hour … the podcast where we answer all of your homebrewing questions and discuss all things related to craft beer!
On Today’s Show:
Due to it being Thanksgiving week, we recorded this week’s episode TOGETHER from the Kegconnection HQ! I apologize ahead of time as it isn’t the best video quality nor is the audio my favorite, but it was actually a ton of fun to record this way and be in person with Todd and James.
We tried to make this episode themed and even brought props as the two questions we discuss have to do with faucets and upgrading your kegerator’s faucets. Spoiler alert: we push CMBecker faucets pretty heavy on this episode!
If you enjoy this format, let us know in the comments below.
REMINDER TO YOU that we have November’s live Q&A booked for members of our Patreon community! Live, at 1pm central on Friday, November 29th I’ll be welcoming longtime friend of the show, Jason Chalifour. He’ll be helping me take your questions on recipe building, malts, and anything else to do with brewing beer. This live Q&A is available to ALL Patrons at EVERY level. So, donate as little as $1 and get access to our private Facebook group as well as perks such as these live Q&As.
We want to hear from you!
If you have a question that you’d like us to discuss on a future episode, please click on the “Submit a Question” link at the top of our website or you can now call in your questions via our questions hotline @ 325-305-6107 and leave your message after the beep. This is a friendly reminder that, if we choose your question for a future episode, we give you a $25 gift card to that episode’s sponsor!
Let us know what you think and enjoy the show!
cheers,
joshua
Become a Patron! Reminder that these episodes are ultimately made possible because of YOUR support. Consider becoming a member of our newly launched Patreon page and receive perks such as merch, exclusive group access and content, recipes, and some tiers even get monthly recipe kits mailed to you!
Are you a member of the American Homebrewers Association yet? Join today and receive a FREE copy of “Session Beers” by Jennifer Talley on top of all the other cool perks that an AHA membership offers — CLICK HERE FOR MORE INFO
Thank you for tuning in to this week’s episode of the Homebrew Happy Hour … the podcast where we answer all of your homebrewing questions and discuss all things related to craft beer!
On Today’s Show:
Todd and James are BACK from Germany/Austria! Even though I’m super jealous of their trip, it was great getting a recap of the Brau tradeshow as well as the fun they had while visiting Vienna.
On this week’s episode, we discuss hygiene for your home kegging system. It’s an often overlooked part of the draft beer experience but having clean tubing and dispensing components will make a *huge* difference in taste and pour. I always worry that episodes like this will bore our audience but I really do believe you’ll learn something from today’s show!
We also have November’s live Q&A booked for members of our Patreon community! Live, at 1pm central on Friday, November 29th I’ll be welcoming longtime friend of the show, Jason Chalifour. He’ll be helping me take your questions on recipe building, malts, and anything else to do with brewing beer. This live Q&A is available to ALL Patrons at EVERY level. So, donate as little as $1 and get access to our private Facebook group as well as perks such as these live Q&As.
We want to hear from you!
If you have a question that you’d like us to discuss on a future episode, please click on the “Submit a Question” link at the top of our website or you can now call in your questions via our questions hotline @ 325-305-6107 and leave your message after the beep. This is a friendly reminder that, if we choose your question for a future episode, we give you a $25 gift card to that episode’s sponsor!
Let us know what you think and enjoy the show!
cheers,
joshua
Become a Patron! Reminder that these episodes are ultimately made possible because of YOUR support. Consider becoming a member of our newly launched Patreon page and receive perks such as merch, exclusive group access and content, recipes, and some tiers even get monthly recipe kits mailed to you!
Are you a member of the American Homebrewers Association yet? Join today and receive a FREE copy of “Session Beers” by Jennifer Talley on top of all the other cool perks that an AHA membership offers — CLICK HERE FOR MORE INFO
Thank you for joining us again for this week’s episode of the Homebrew Happy Hour … the podcast where we answer all of your homebrewing questions and discuss all things related to craft beer!
On Today’s Show:
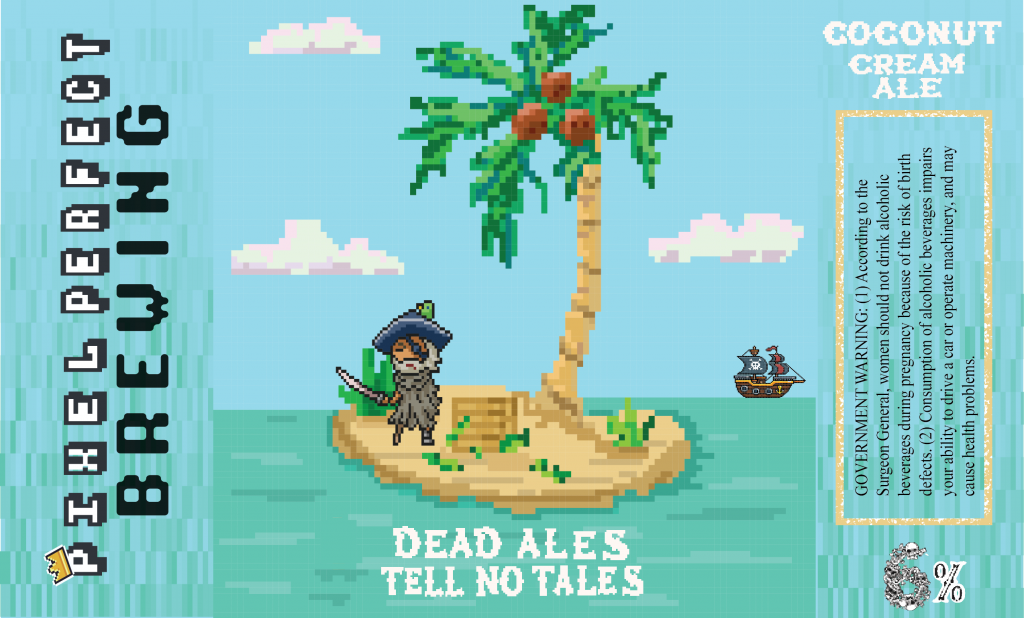
Todd and James are out of the country, attending the Brau in Nuremberg, Germany, so I’m excited to present this week’s episode; another “Homebrewer Showcase”! Rob Partin from Virginia is the man behind “Pixel Perfect Brewing” and he is also responsible for some really awesome label art for his beers.
Rob is also big into canning so I’m glad I was able to pick his brain a little and learn a lot about how easy it is for homebrewers to get into canning as well as the benefits of canning versus bottling.
I had a ton of fun with Rob and I hope you enjoy this week’s episode.
We want to hear from you!
If you have a question that you’d like us to discuss on a future episode, please click on the “Submit a Question” link at the top of our website or you can now call in your questions via our questions hotline @ 325-305-6107 and leave your message after the beep. This is a friendly reminder that, if we choose your question for a future episode, we give you a $25 gift card to that episode’s sponsor!
Let us know what you think and enjoy the show!
cheers,
joshua
Become a Patron! Reminder that these episodes are ultimately made possible because of YOUR support. Consider becoming a member of our newly launched Patreon page and receive perks such as merch, exclusive group access and content, recipes, and some tiers even get monthly recipe kits mailed to you!
Are you a member of the American Homebrewers Association yet? Join today and receive a FREE copy of “Session Beers” by Jennifer Talley on top of all the other cool perks that an AHA membership offers — CLICK HERE FOR MORE INFO
American lagers (especially light lagers) are as American as mom, apple pie, and the US flag. As homebrewers and lovers of craft beer, we tend to denigrate American Lagers. Perhaps our grandfather’s American lager is not the same beer we have available today? The American Lagers of today may have mass appeal for many drinkers, but the American beers before the 1970s were not the light adjunct-laden low hopped lagers available in 30 packs today. The big brewing companies are known to have taken out some of the hops and added additional corn syrup to make a less expensive beer that would appeal to the masses, creating beer drinkers out of those who were not fond of beer. How did we get there? Is there a home for real American lagers in your fridge?
American lagers (especially light lagers) are as American as mom, apple pie, and the US flag. As homebrewers and lovers of craft beer, we tend to denigrate American Lagers. Perhaps our grandfather’s American lager is not the same beer we have available today? The American Lagers of today may have mass appeal for many drinkers, but the American beers before the 1970s were not the light adjunct-laden low hopped lagers available in 30 packs today. The big brewing companies are known to have taken out some of the hops and added additional corn syrup to make a less expensive beer that would appeal to the masses, creating beer drinkers out of those who were not fond of beer. How did we get there? Is there a home for real American lagers in your fridge?
It’s time we homebrewers claimed real American lager back. Let’s give the nod to the beer that the greatest generation drank!
The consensus is that American lagers from our grandfather’s time were pale lagers (or ales in some cases) with a clean, refreshing, and more robust flavor than today’s versions. Maltier, more bitter, and hoppier with higher alcohol by volume (ABV), these beers captured America’s taste buds and hearts, especially pre-Prohibition. After Prohibition, these classic American pilsners were a little less bitter with a little less ABV. Because few American breweries make these beers today, homebrewers are left to design (and drink!) their creations.
How did we get to this point? A classic American beer that was loved by our grandfathers is now a shadow of itself. How can we make American Lagers great again?
Budweiser. Schlitz. Olympia. Ballantine. Old Milwaukee. These are the ones that were best known and loved and at one time, among the largest breweries in the US.
Budweiser
With a tagline of “The King of Beer,” this best-known brand was first brewed in 1876. Founded by Adolphus Busch, the Anheuser-Busch Brewing Company was the first American brewery to use pasteurization as early as the 1870s and introduced artificial refrigeration and even refrigerated railcars. This ensured national distribution, making them a part of the American fabric. Budweiser was the original creator of the light-colored American lager, as the others available at the time were darker. The recipe, which includes 30% rice, is mostly responsible for this. Prohibition created a brief set back while they produced non-alcoholic sodas and malt products, but after the repealing of Prohibition, they rebounded and became the #1 brand in American by the late 1950s. Nearly everyone contends that the Bud they knew and loved had changed over the years, becoming more nondescript. A Wall Street Journal article states that “Anheuser concedes Budweiser has changed over the years. It quietly tinkered with its formula to make the beer less bitter and pungent, say several former brewmasters, a byproduct of the company’s desire to create a beer for the Everyman.”
Founded in 1849 and then acquired by Joseph Schlitz in 1858, the brewery was officially named the Joseph Schlitz Brewing Company. This brewery based in Milwaukee, Wisconsin, was once the largest producer of beer in the United States, beginning in 1902 when the production of one million barrels exceeded Pabst’s offerings. There was a brief change in the company’s name during Prohibition to Schlitz Beverage Company because of the ban on manufacturing alcoholic beverages. Once Prohibition ended, the “Beer that Made Milwaukee Famous” brand remained a powerhouse brewery until the mid-1970s. Many of today’s older adults remember the commercials with the line, “When you’re out of Schlitz, you’re out of beer.” In the early years of the 1970s, there was still a considerable demand for Schlitz beer, and the ownership also wanted to cut the cost of production. This meant a massive change in the brewing of Schlitz beer. This was the point where adjuncts were added in the form of corn syrup to replace some of the more expensive malted barley. Other changes included fermenting the beer at a higher temperature as a cost-saving measure and using cheaper extracts. By not cold storing the beer as long as in the past, the beer was rushed to bottle sooner. They tried continuous fermentation instead of the traditional method. Because a haze resulted from these changes, the brewery began adding a silica gel to prevent this haze. The new Schlitz formula for their flagship beer lost much of its following, as the flavor had changed, and it seemed less shelf-stable. At the same time, the Food and Drug Administration began enacting labeling laws, and the silica gel was a concern for the brewery. They experimented with a different clarifier that would not be subject to labeling requirements, but the unexpected reaction of this clarifier to their bottles created a recall for 10 million bottles of beer. This sealed the decline of Schlitz, and they ceased production in 1981. Sold and resold, Pabst gained control of the Schlitz name in 1999. According to documents, the original recipe for Schlitz was lost during the remaking of the brand in the early 70s. After acquiring the Schlitz brand in 1999, Pabst claims to have reconstructed the original well-loved formula by interviewing former brewmasters and researching old papers.
Old Milwaukee
The brand Old Milwaukee was produced by the Joseph Schlitz Brewing Company. It was also first brewed in 1849 and became a value-priced offering from Schlitz in the 1930s following Prohibition. It used adjuncts and could be considered one of the first of America’s light lagers. Using corn syrup and fewer hops from at least the 1930s on, it was a less expensive (and less flavorful) beer to produce. Advertised with the tagline, “It doesn’t get any better than this!” many people would disagree. Pabst Brewing Company continues to produce Schlitz beer and Old Milwaukee.
Ballantine
Ballantine may not be as well known as Schlitz, but at one time, was the 3rd largest brewing company in the US. Beginning production in 1840, Ballantine is notably the first US brewery to make an India Pale Ale while its Ballantine XXX Ale was the most popular offering. Unlike today’s major breweries, Ballantine was known for its ales, although it did produce a couple of lagers as well. Manufacturing malt syrup to stay afloat during Prohibition, once the ban on manufacturing alcohol was lifted in 1933, the company ramped up its beer production remaining quite popular until the mid-1960s. The public’s infatuation with the available new lighter lagers spelled the beginning of the end for the owners who sold the brewery in 1972. The recipes changed, and the brand continued to lose popularity. It was resold, and acquired by Pabst in 1985. Pabst continued to brew the Ballantine label but stopped brewing the IPA in 1996. The last remaining beer was XXX Ale, although the recipe changed several times over the years and is not the same as the original. In 2014, Pabst relaunched a new Ballantine IPA, although the original recipe was lost, and this is their attempt to recreate it. Pabst also recreated Ballantine’s Burton Ale for a special release in 2015. Mitch Steele’s book on India pale ales, IPA: Brewing Techniques, Recipes, and the Evolution of India Pale Ale includes a recipe of his re-creation of the Ballantine IPA named “Cluster’s Last Stand.” Using the hops and grains most likely available and used in the original, this recipe may be a close facsimile of the beer.
Olympia
Founded in 1896, The Olympia Brewing Company was located near Olympia, Washington. With the slogan “It’s the Water,” the brewery was successful, but Prohibition ended operations at the original location. With a new brewery, the brewing began at a new site just upriver in 1934. A trendy regional brand for more than 50 years, it eventually expanded its distribution nationally and was known as a value-priced lager. Because it was distributed nationally while other American lagers like Coors were not, the brand did very well until the early 1970s. After that time, sales stalled, and the company was sold in 1983. Through corporate consolidation, it changed hands several times (G. Heileman, Stroh’s, Pabst, SABMiller) and is currently contract brewed by MillerCoors.
Reclaim American Lagers!
We’ve all heard the jokes about American lagers! They are “like having sex in a canoe (google the joke if you’re unfamiliar).” We’ve heard them called swill and, even worse, had craft beer lovers turn their nose up at the idea of having one. Still, the real American lager is a great beer. The classic American pilsner has flavor, aroma, and crispness, and is not a watered-down version of any other beer. Homebrewers should be proud to have such a style as this in their repertoire and beer snobs, er, connoisseurs, can enjoy it with pride.
Recreating these Beers
Recreating the original version of these beers may be quite tricky, even for the companies who now own them, as records where not always kept in tough times as in Prohibition or during a sale. Adding to the difficulty, recipe formulations were changed based on cost, availability, and drinker’s tastes as lighter American lagers became more popular.
Many old-time Schlitz lovers insist that today’s Schlitz is far different than the beer they knew and loved. To recreate the original Schlitz, we need to consider the ingredients available to the brewery during its heyday. We also need to remember the flavor profile that’s been described. Before ingredients like corn syrup were added, American pale lagers likely had more alcohol, more body, more malt flavor, a tad more bitterness, and a bit more hops flavor and aroma. There would be a similar balance and bitterness as today’s Czech pale lagers, but with American hops and grains.
Cluster hops were likely the bittering hops used and were the predominant US hops variety available, especially in Wisconsin. To this day, if you drive in rural Wisconsin and see vines growing up over old farmhouses and barns, you will see cluster hops gone wild. Some recipes of pre-prohibition lagers have been known to use imported hops- notably, a Budweiser label from 1900 showed “Saaz hops” as an ingredient.
For the grain bill, it’s quite likely to have used a very light-colored base malt along with some corn as the adjunct. For a complete and quick conversion of the starches to sugars, some malt with higher diastatic power would have been used, so we’d include some 6-row malted barley. This beer would be fermented cool (50 degrees F) and lagered at 40 degrees for 4-6 weeks. The recipe below uses a traditional lager yeast for more authentic results, but with some of the new yeast strains available, you may choose a different fermentation schedule.
Yooper’s Oh Schlitz (recipe)
5 Gallon Batch OG 1.053 FG 1.013 Est ABV 5.18% Grain 6.5 lbs American pilsner malt 2.25 lbs flaked corn 1.3 lbs American 6-row malt (or sub with American pilsner malt if unavailable) The authentic recipe would utilize a step mash, with a protein rest at 122F, a beta rest at 148F, and an alpha rest at 156 and/or a cereal mash. However, with today’s modern malts, a single mash rest at 150F would do if step mashing is not convenient. Hops 1.25 oz Cluster hops (6.5AA) 60 minutes 1.25 oz Crystal hops (4.3 AA) 0 minutes (added at flameout) Yeast White Labs 833 German Bock Yeast (or the lager yeast of your choice suitable for American pale lagers) Ferment at 50F degrees until 75% finished, then raise the temperature for a diacetyl rest to 68F until finished. Lager at 40 degrees for 4-6 weeks before serving.
Enjoy your foray into recreating these classic beers!
Thank you for joining us for yet another episode of the Homebrew Happy Hour … the podcast where we answer YOUR homebrewing questions and discuss all things related to craft beer!
On Today’s Show:
Todd and James join me once again for the most fun I’ve had all week. To be fair, it’s been a pretty boring week… KIDDING, Todd!
For this week’s show, I fielded some questions that focused specifically on extract brewing. It’s easy, as an all-grain brewer, to forget how good of beers you can produce from extract reccipes! I, personally, also tend to forget how much and enjoyable an extract brew day can be… specifically, when it comes to the clean up and time management components. I feel like we should produce some #brewday videos doing extract batches; what do you think?
We want to hear from you!
If you have a question that you’d like us to discuss on a future episode, please click on the “Submit a Question” link at the top of our website or you can now call in your questions via our questions hotline @ 325-305-6107 and leave your message after the beep. This is a friendly reminder that, if we choose your question for a future episode, we give you a $25 gift card to that episode’s sponsor!
Let us know what you think and enjoy the show!
cheers,
joshua
Become a Patron! Reminder that these episodes are ultimately made possible because of YOUR support. Consider becoming a member of our newly launched Patreon page and receive perks such as merch, exclusive group access and content, recipes, and some tiers even get monthly recipe kits mailed to you!
Are you a member of the American Homebrewers Association yet? Join today and receive a FREE copy of “Session Beers” by Jennifer Talley on top of all the other cool perks that an AHA membership offers — CLICK HERE FOR MORE INFO
Every Black Friday, folks head out in droves to do their holiday shopping. If you’re into craft beer, you know that Black Friday is also the day that Bourbon County Stout from Goose Island comes out. In very populated areas, it can be hard to get your hands on, and like many popular beers, clone recipe trials and tests are not far around the corner. Thankfully, Goose Island list some of the essentials on their website, so a close clone isn’t as hard to achieve in this case.
About Bourbon County Stout
If you don’t know, Bourbon County Stout a big beer (13-15% varies a bit yearly). It’s aged in bourbon barres and the label says it can age and develop an additional five years in the bottle. Prior to last year, they were available in four packs of 12oz bottles or in singles in many beer stores. Now (2015 and beyond), they are released in 16.9oz bottles. There are several other styles in the Bourbon County family, but today we are only talking about a clone for the bourbon county stout.
Bourbon County Stout Clone
I mentioned that they list a lot of important recipe information on their site, meaning we have a great jumping off point. So let’s begin there. The grain bill for the 2016 release includes 2 Row, Black Malt, Caramel malt, Chocolate Malt, Munuch 10L, and Roasted Barley. The only hops used are Millennium, so that makes figuring out things a lot easier. Lastly it has 60 IBUs and is 13.8% ABV. This is actually more information than you can usually find when trying to formulate a clone. Bourbon County is one of the thickest stouts you can get. The final gravity should land around 1.030, so to get to 13.8% we would need a starting gravity of 1.135. That’s a very high starting point, so extra care will be needed when it comes to fermentation management, which we’ll get to a bit later. Here is what the recipe looks like for a 5 gallon batch with 75% efficiency.
Bourbon County Clone
Grains / Extracts
Hop Schedule
Yeast
17 Pounds – 2 Row
.7 Pounds – Black Malt
1 Pound – Crystal 60L
1 Pound – Chocolate Malt
1 Pounds – Roasted Barley
5 Pounds – Munich (10L)
1oz – Millennium @60
1oz – Millennium @45
Safale US-05
By the NumbersOG: 1.135 FG: 1.030 ABV: 13.8% IBUs 60
Now, that grain bill likely pushes the very upper limits of your mash tun, if not exceeds it. Your mash will likely be a thicker ratio than you’re normally used to mashing at. This can have a negative affect on your brewhouse effeciency. Because of this, It’s a good idea to have several pounds of light extract on hand in case you don’t hit your numbers. The other option is to continue onward with a slightly lower starting gravity. You should still end up with a close rendition of Bourbon County, even at 10-11%.
Yeast Nutrition and Fermentation Management
It goes without saying that you should pitch a large starter to ensure full attenuation. Consider stepping it up 2-3 times. Oxygenation is another important method to employ to help your beer attenuate to your desired FG. Higher OG beers require a bit more oxygenation as they do not absorb oxygen as easily. You should also consider oxygenating twice, once at pitch, and once 12 hours later, to ensure the yeast has all it needs during its reproductive phase. You can charge your beer up to 8ppm of oxygen using an air pump oxygenation kit. In addition, you should look to add extra yeast nutrient to the beer. Adopting a staggered nutrient addition regiment, similar to that used by mead makers to ensure healthy and complete fermentations in high stress scenarios. Instead of adding the entire dose of nutrients when you pitch your yeast, simply add 1/3 of a full dose at pitch, another 1/3 after the lag phase has ended, and a final 1/3 a day later. Basically, this keeps the yeast happy without feeding them a bunch of nutrient up front where they may get lazy after a day or two.
Aging With Oak and Bourbon, and Conditioning
Now you’re on the home stretch of your Bourbon County clone. If you’re using chips or cubes, make sure you use heavy toast, or at least medium, as they will be the closest imitation to the wood used for a bourbon barrel. Soak the chips or cubes in bourbon while the beer is fermenting. When fermentation is done or mostly done, add the bourbon and oak to the beer. You’ll want to pay attention to not over-oak the beer. Once it’s at a point you are happy with (take samples to monitor progress) you can prime and bottle or transfer to a keg. When it comes to conditioning, Goose Island bottles in October, and the beer is released at the end of November. So plan on conditioning for at least 7-8 weeks for more accuracy, and continue to age as you see fit from there.
Thank you for joining us for yet another episode of the Homebrew Happy Hour … the podcast where we answer YOUR homebrewing questions and discuss all things related to craft beer!
I don’t know where you’re tuning in from but, here in central Texas, it is FINALLY feeling like brewing weather. High 40’s, low 50’s (Fahrenheit, to clarify for our international crowd!) and sunny days. I LOVE IT! I hope you’re having good weather and even better brewing days too.
On Today’s Show:
Matt Bolling from the American Homebrewer’s Association joins me today to discuss the upcoming “Learn to Homebrew Day” which is THIS SATURDAY, November 2nd, 2019. It’s always the first Saturday of November and it is always a good time!
Matt is the Events & Membership Coordinator at the AHA and we’ve known him for a while. If you’ve ever attended any of the events put on by the AHA and/or the BA, you’ve probably seen Matt around or at least experienced a good time thanks to the efforts of Matt and the entire team there at the AHA.
He talks about Learn to Homebrew Day as well other fun stuff such as the other events going on throughout the year, his own homebrewing experience, and the benefits and joys of being a part of a local homebrewing club. I had an absolute blast with Matt and hope to have him on again in the future!
We want to hear from you!
If you have a question that you’d like us to discuss on a future episode, please click on the “Submit a Question” link at the top of our website or you can now call in your questions via our questions hotline @ 325-305-6107 and leave your message after the beep. This is a friendly reminder that, if we choose your question for a future episode, we give you a $25 gift card to that episode’s sponsor!
Let us know what you think and enjoy the show!
cheers,
joshua
——————-
Become a Patron! Reminder that these episodes are ultimately made possible because of YOUR support. Consider becoming a member of our newly launched Patreon page and receive perks such as merch, exclusive group access and content, recipes, and some tiers even get monthly recipe kits mailed to you!
Thank you for joining us for yet another episode of the Homebrew Happy Hour … the podcast where we answer YOUR homebrewing questions and discuss all things related to craft beer!
On Today’s Show:
Todd and James join me for a fun filled episode of the show! We catch up with the birthday boy, Mr. Carlson, about him turning 50. We also are reminded how annoyed Todd gets by me and how much he’s looking forward to me starting to gush about Founder’s Breakfast Stout (can you sense the sarcasm yet?). We also eventually take a couple of questions and it’s this segment of the show that I’m most thankful for Todd and James! Kidding aside —
I would also like to remind everyone that our very first Patreon exclusive LIVE Q&A is THIS FRIDAY (October 25th) at 6pm in our private Facebook group that you can join at ANY level of our Patreon community. The lovely Lorena Evans will be taking your questions and it’s going to be a blast!
We want to hear from you!
If you have a question that you’d like us to discuss on a future episode, please click on the “Submit a Question” link at the top of our website or you can now call in your questions via our questions hotline @ 325-305-6107 and leave your message after the beep. This is a friendly reminder that, if we choose your question for a future episode, we give you a $25 gift card to that episode’s sponsor!
Let us know what you think and enjoy the show!
cheers,
joshua
Become a Patron! Reminder that these episodes are ultimately made possible because of YOUR support. Consider becoming a member of our newly launched Patreon page and receive perks such as merch, exclusive group access and content, recipes, and some tiers even get monthly recipe kits mailed to you!
October’s Patreon Featured Recipe: https://www.kegconnection.com/koln-kolsch-true-to-style-all-grain-recipe-kit/
https://www.patreon.com/HomebrewHappyHour
Bohemian Pilsner that James brewed –
All Grain: https://homebrewsupply.com/bohemian-pilsner-all-grain-recipe-kit/
Extract: https://homebrewsupply.com/bohemian-pilsner-extract-recipe-kit/
02:28 – Todd’s idea for promoting our Patreon
07:41 – New recipes we’re developing
08:56 – News and exclusives for our Patreon community
12:00 – Update one James’ latest brew, a Bohemian Pilsner
15:40 – HAPPY BIRTHDAY, JAMES!
18:13 – Question 1, upgrading fermentation equipment
34:50 – Question 2, using a kegerator to serve and ferment?
We’ve gotten a few requests from listeners of our podcast on how to replace the bonnet on their premium Taprite regulator whenever it strips. Stripping isn’t a common issue with these regulators but can occur, especially if you’re using your system consistently to force carbonate your beer. Fortunately, it’s easier to fix than you might think! James Carlson from CMBecker International shows you how in this short and sweet video. REMINDER – if you did purchase your Taprite regulator from Kegconnection.com, it does come with a 2-year extended warranty! So, if you don’t feel like replacing the bonnet yourself, you can ship it to Kegconnection and they’ll replace it for free and cover the shipping costs. However, if you’re like us and would rather not wait longer than you have to, you can also get the replacement kit shipped out to you and do it yourself! T